Data Submission
nmrXiv assists scientists in collecting, storing, processing, analyzing, disclosing, and reusing data from Nuclear Magnetic Resonance Spectroscopy research. We offer a seamless and straightforward submission process, allowing you to submit NMR data easily in just three steps. This documentation guides you through each step of the submission process. If you encounter any issues or have valuable feedback, please do not hesitate to contact us at info.nmrxiv@uni-jena.de.
Before You start
Before you start submitting your data, you need to:
- First, register to create an account in nmrXiv, or login to nmrXiv via single sign-on with your GitHub or Twitter ID. Please be aware that the single sign-on will result in registering you on nmrXiv.
- Make sure to structure your folder in the way described here.
- Make sure to include at least one file format supported by NMRium in your folder to generate spectra.
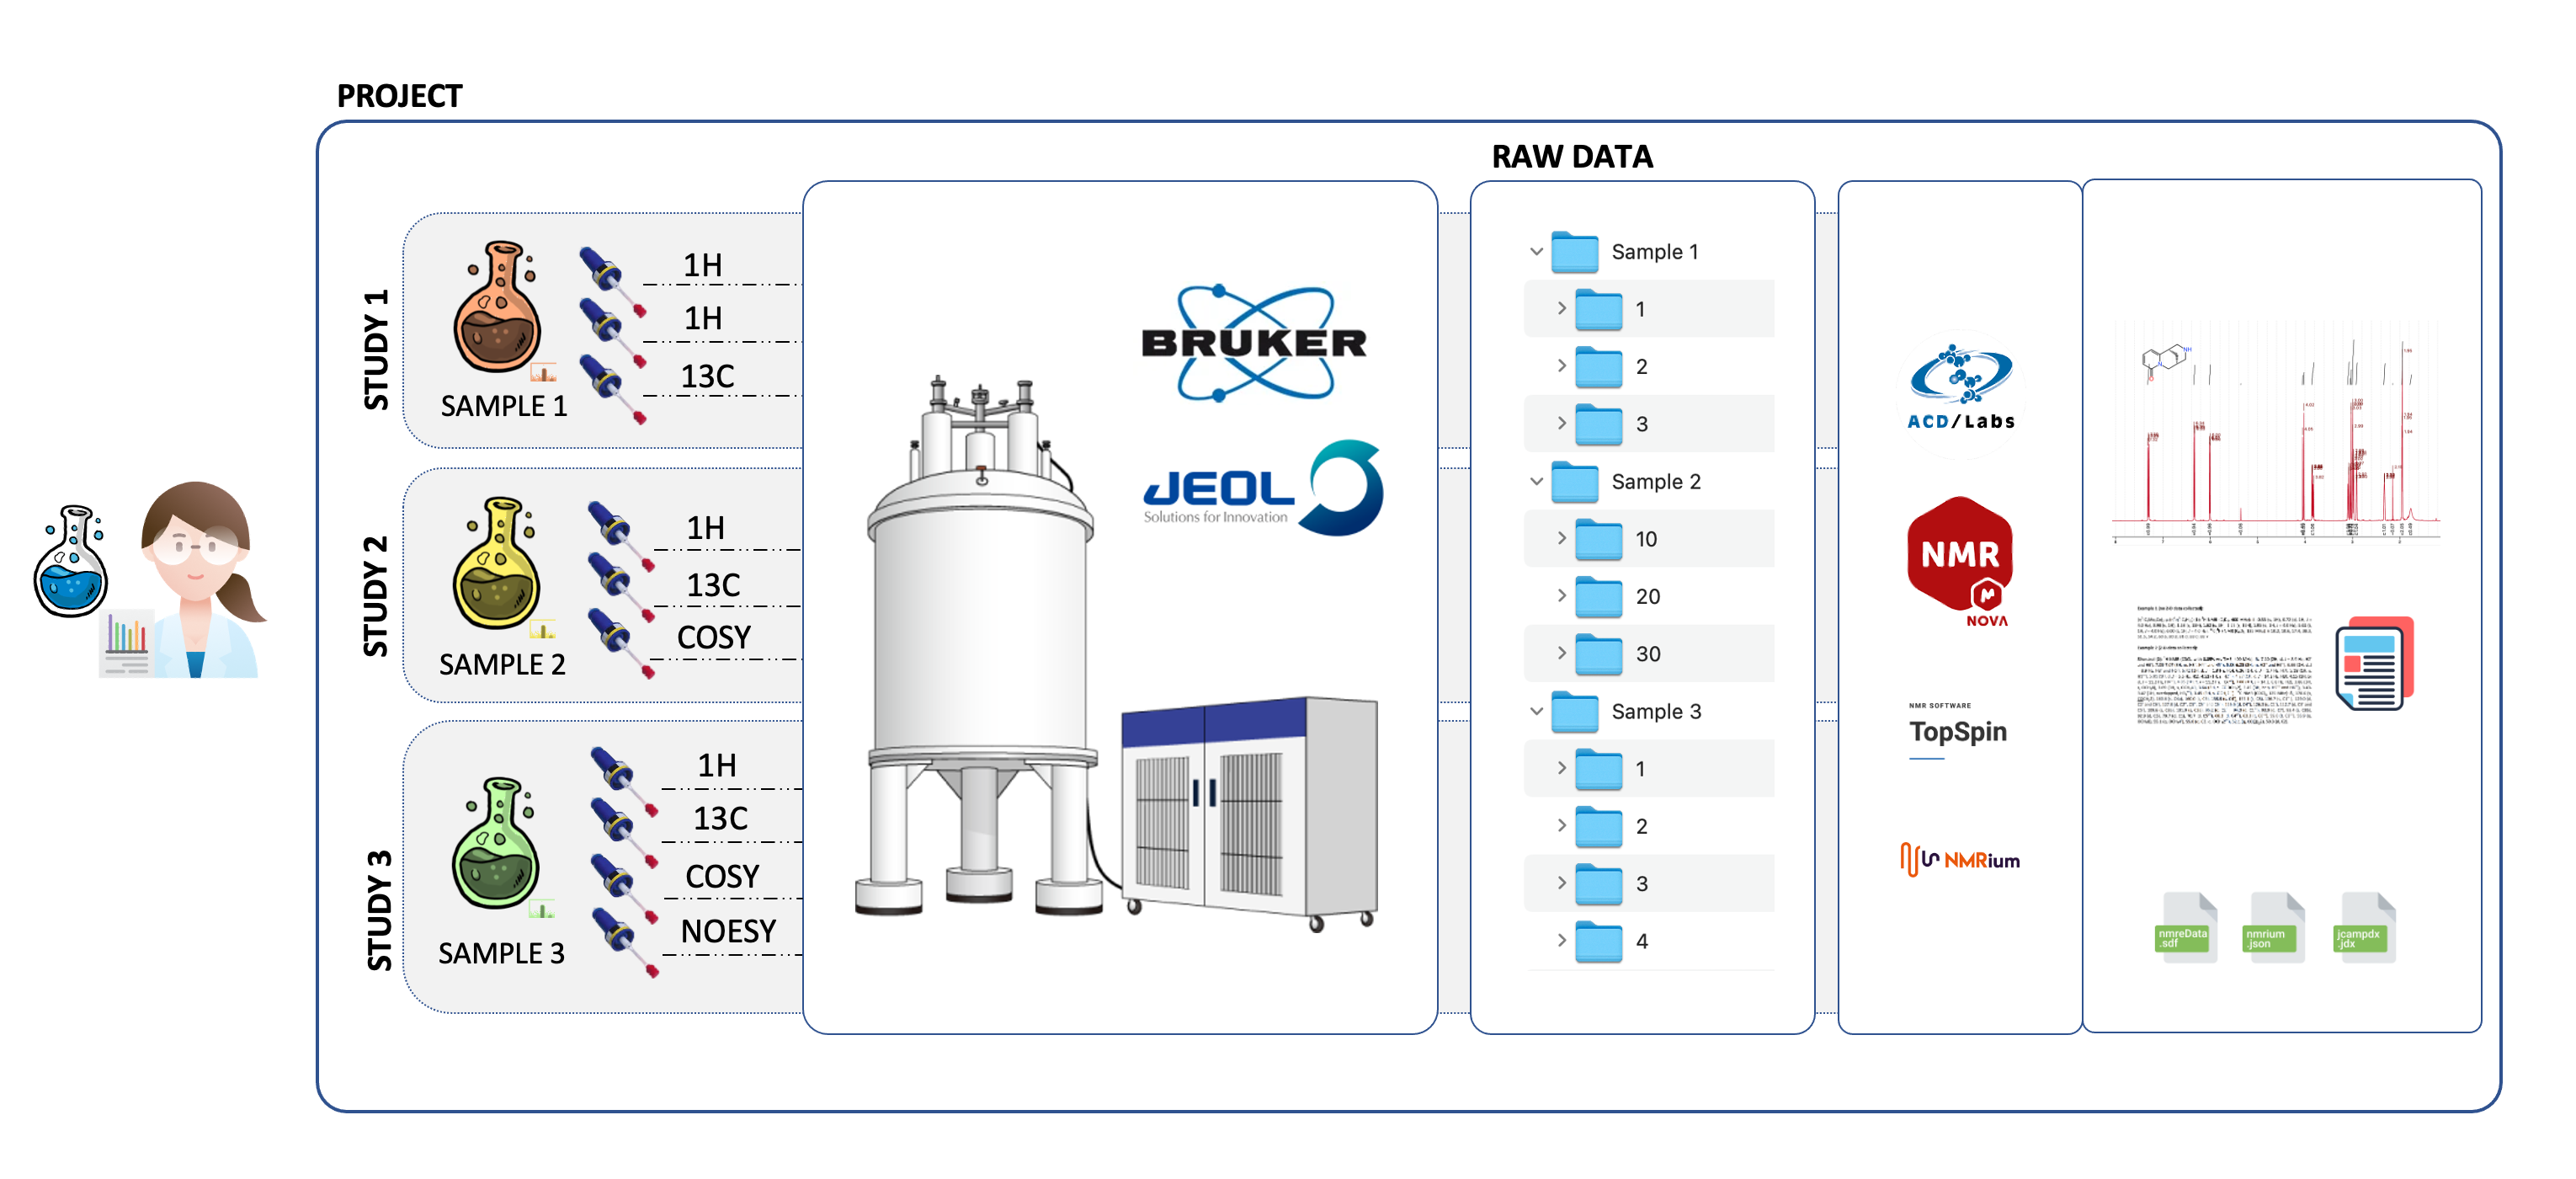
- In nmrXiv, data is organised as projects. Consider a project is equivalent to your publication with the corresponding NMR data to be uploaded to nmrXiv.
- A project can have multiple samples - A sample study corresponds to a group of NMR experiments of one sample, e.g. 1H, 13C, APT, COSY HSQC, HMBC, NOESY in Bruker Format or (another study) in another format such as JCAMP-DX / Variant.
- Each NMR measurement in a sample study is referred to as a dataset, e.g. 1H NMR or COSY (are each a dataset).
- nmrXiv allows you to upload NMR raw data from any NMR instrument. We can currently auto-detect Bruker/Varian/JOEL formats & JCAMP files and will support more raw & processed file formats soon. Once you upload your raw or processed NMR data, nmrXiv will auto-generate the samples and datasets for you based on the uploaded folder structure.
- Once your project is made public you will not be able to edit the information.
What You Need to Know
- After submitting the data, it will be visible only to you and will remain private until you decide to make it public and generate a DOI.
- You can delete your project at any time before making it public. However, once the project is public, it cannot be deleted but can only be archived. This is because once a project is public, it may be referenced elsewhere, necessitating the repository to maintain an active link to the project. To learn more about deleting and archiving policy click here.
- When the project is made public, it becomes visible and open to everyone for accessing and downloading files, even if one is not registered on nmrxiv.
- All the data uploaded to nmrXiv are stored in the S3 bucket provisioned by the University Computing Center of Friedrich-Schiller-Universität Jena and are backed up daily to the Google Cloud Storage Archive Storage with multiple regions located in the European Union.
The Submission Pipeline
Step 1 - Files Upload:
- Click on the
UPLOADbutton in your Dashboard or the team dashboard to start the submission pipeline.

- A brief introduction accompanied by a well-described diagram will appear on your screen, providing an overview of how the data will be organized in nmrXiv. Once you have read it, please click on the 'PROCEED' button to move on to the next step.

- By default, the project's name will be
UNTITLED PROJECTwhich is editable and can be overridden once you click on it and choose a suitable name that corresponds to your type of data. - The upload begins when you drag and drop the folder, and it will take a few minutes to complete. Please wait until the Batch Upload finishes. You can also check the logs by clicking on
View Logsin case of any failures.
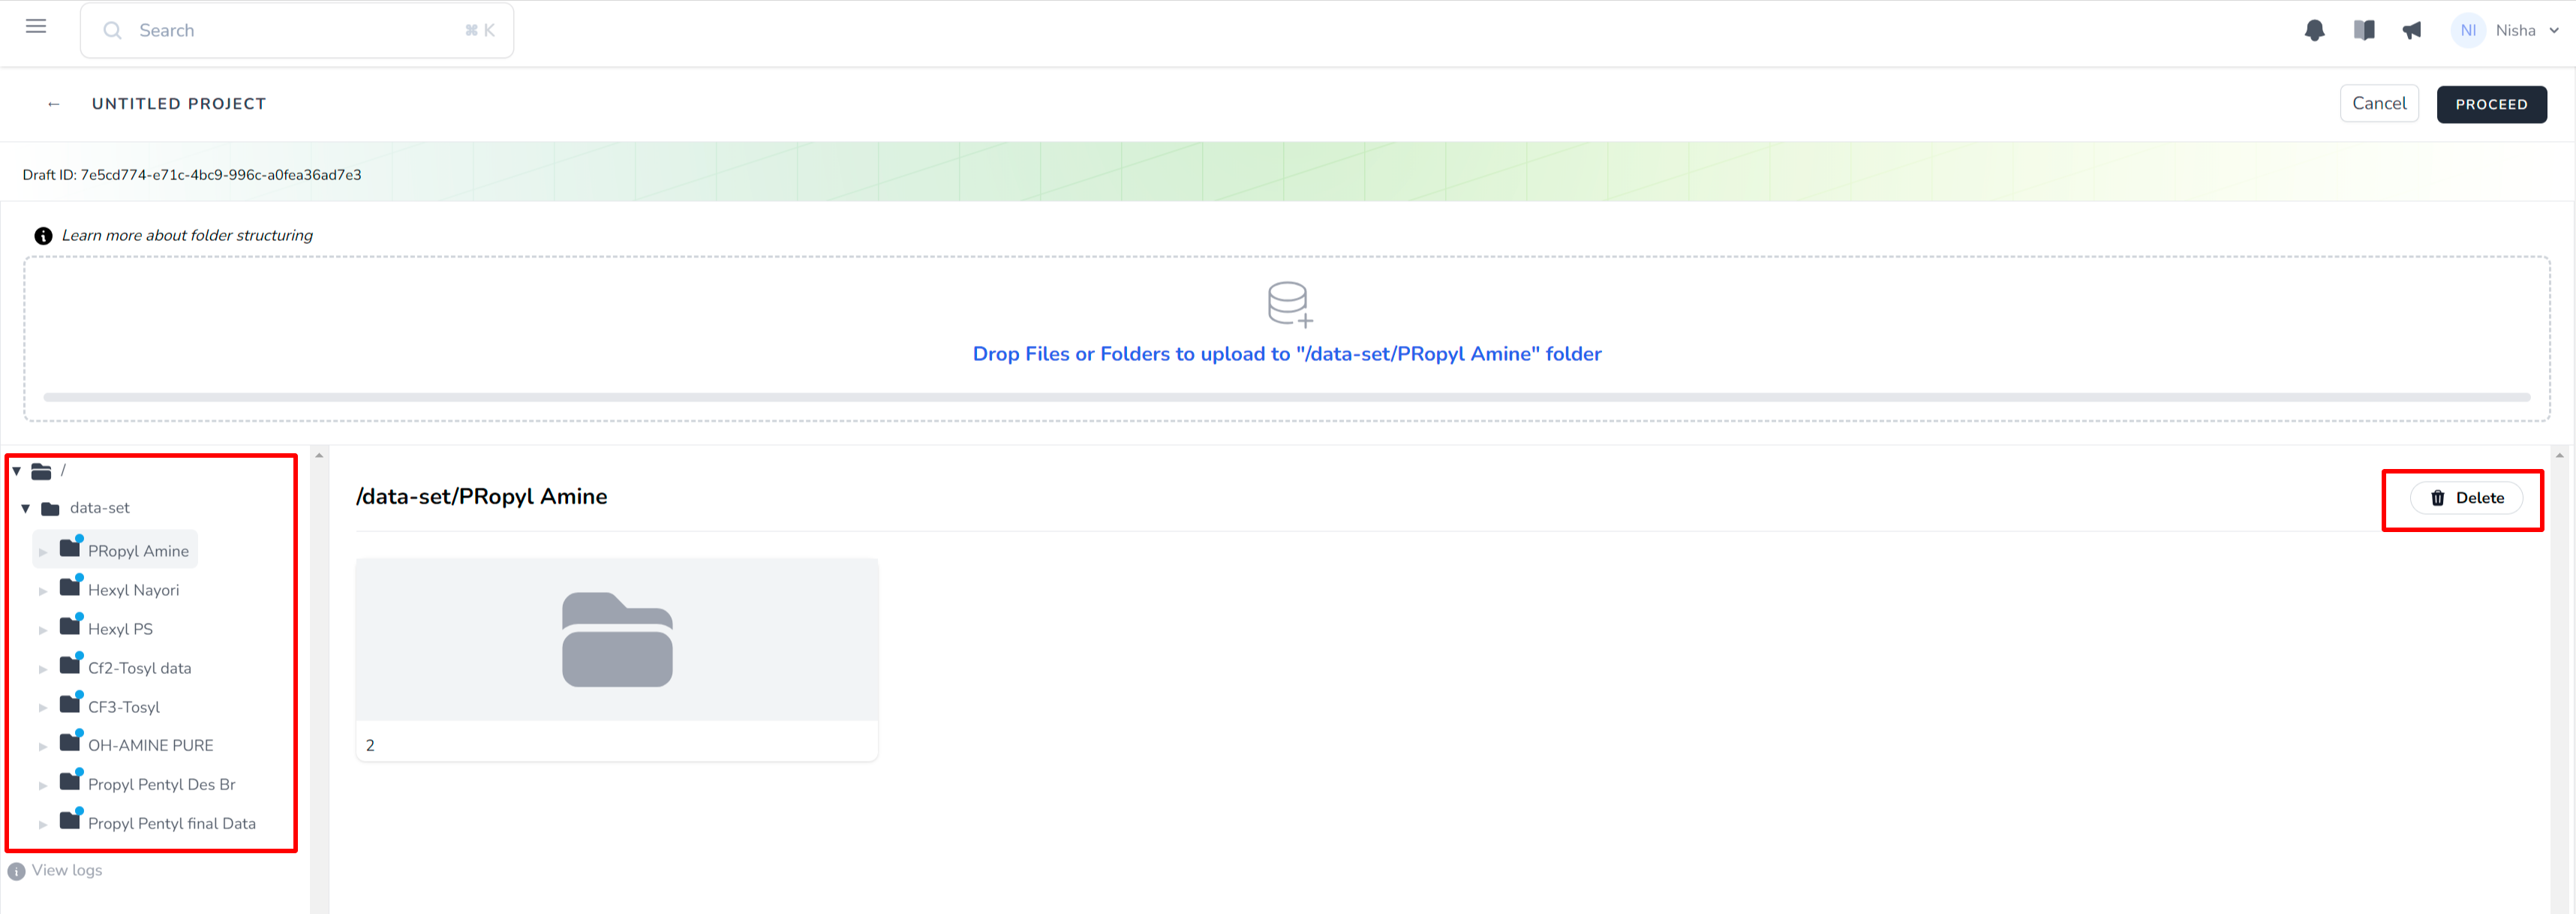
- After the upload is complete, you can view the files on the left side, allowing easy navigation to check the tree. You also have the option to delete specific files or folders by selecting them and clicking the 'Delete' button. If you wish to upload additional files to a specific path, select the desired path and drag and drop the files.
A small clip showcasing the Step-1 of file upload process.
Step 2 - Auto Processing, Assignments and Validation
- In this step, your data is organized into samples, and you have the opportunity to input missing metadata for these samples. On the left side, you can observe that 7 samples have been created, collectively comprising 8 spectra. Please wait for a moment until all the metadata for the spectra has been processed.
- The
Samples Validationsection remains Incomplete, as your upload lacks certain metadata required to meet community standards. Currently, we are verifying the mandatory metadata specified by DataCite necessary to obtain a DOI in addition to requesting an image for the project. Click on theImport nowbutton to automatically import the missing Spectra information.
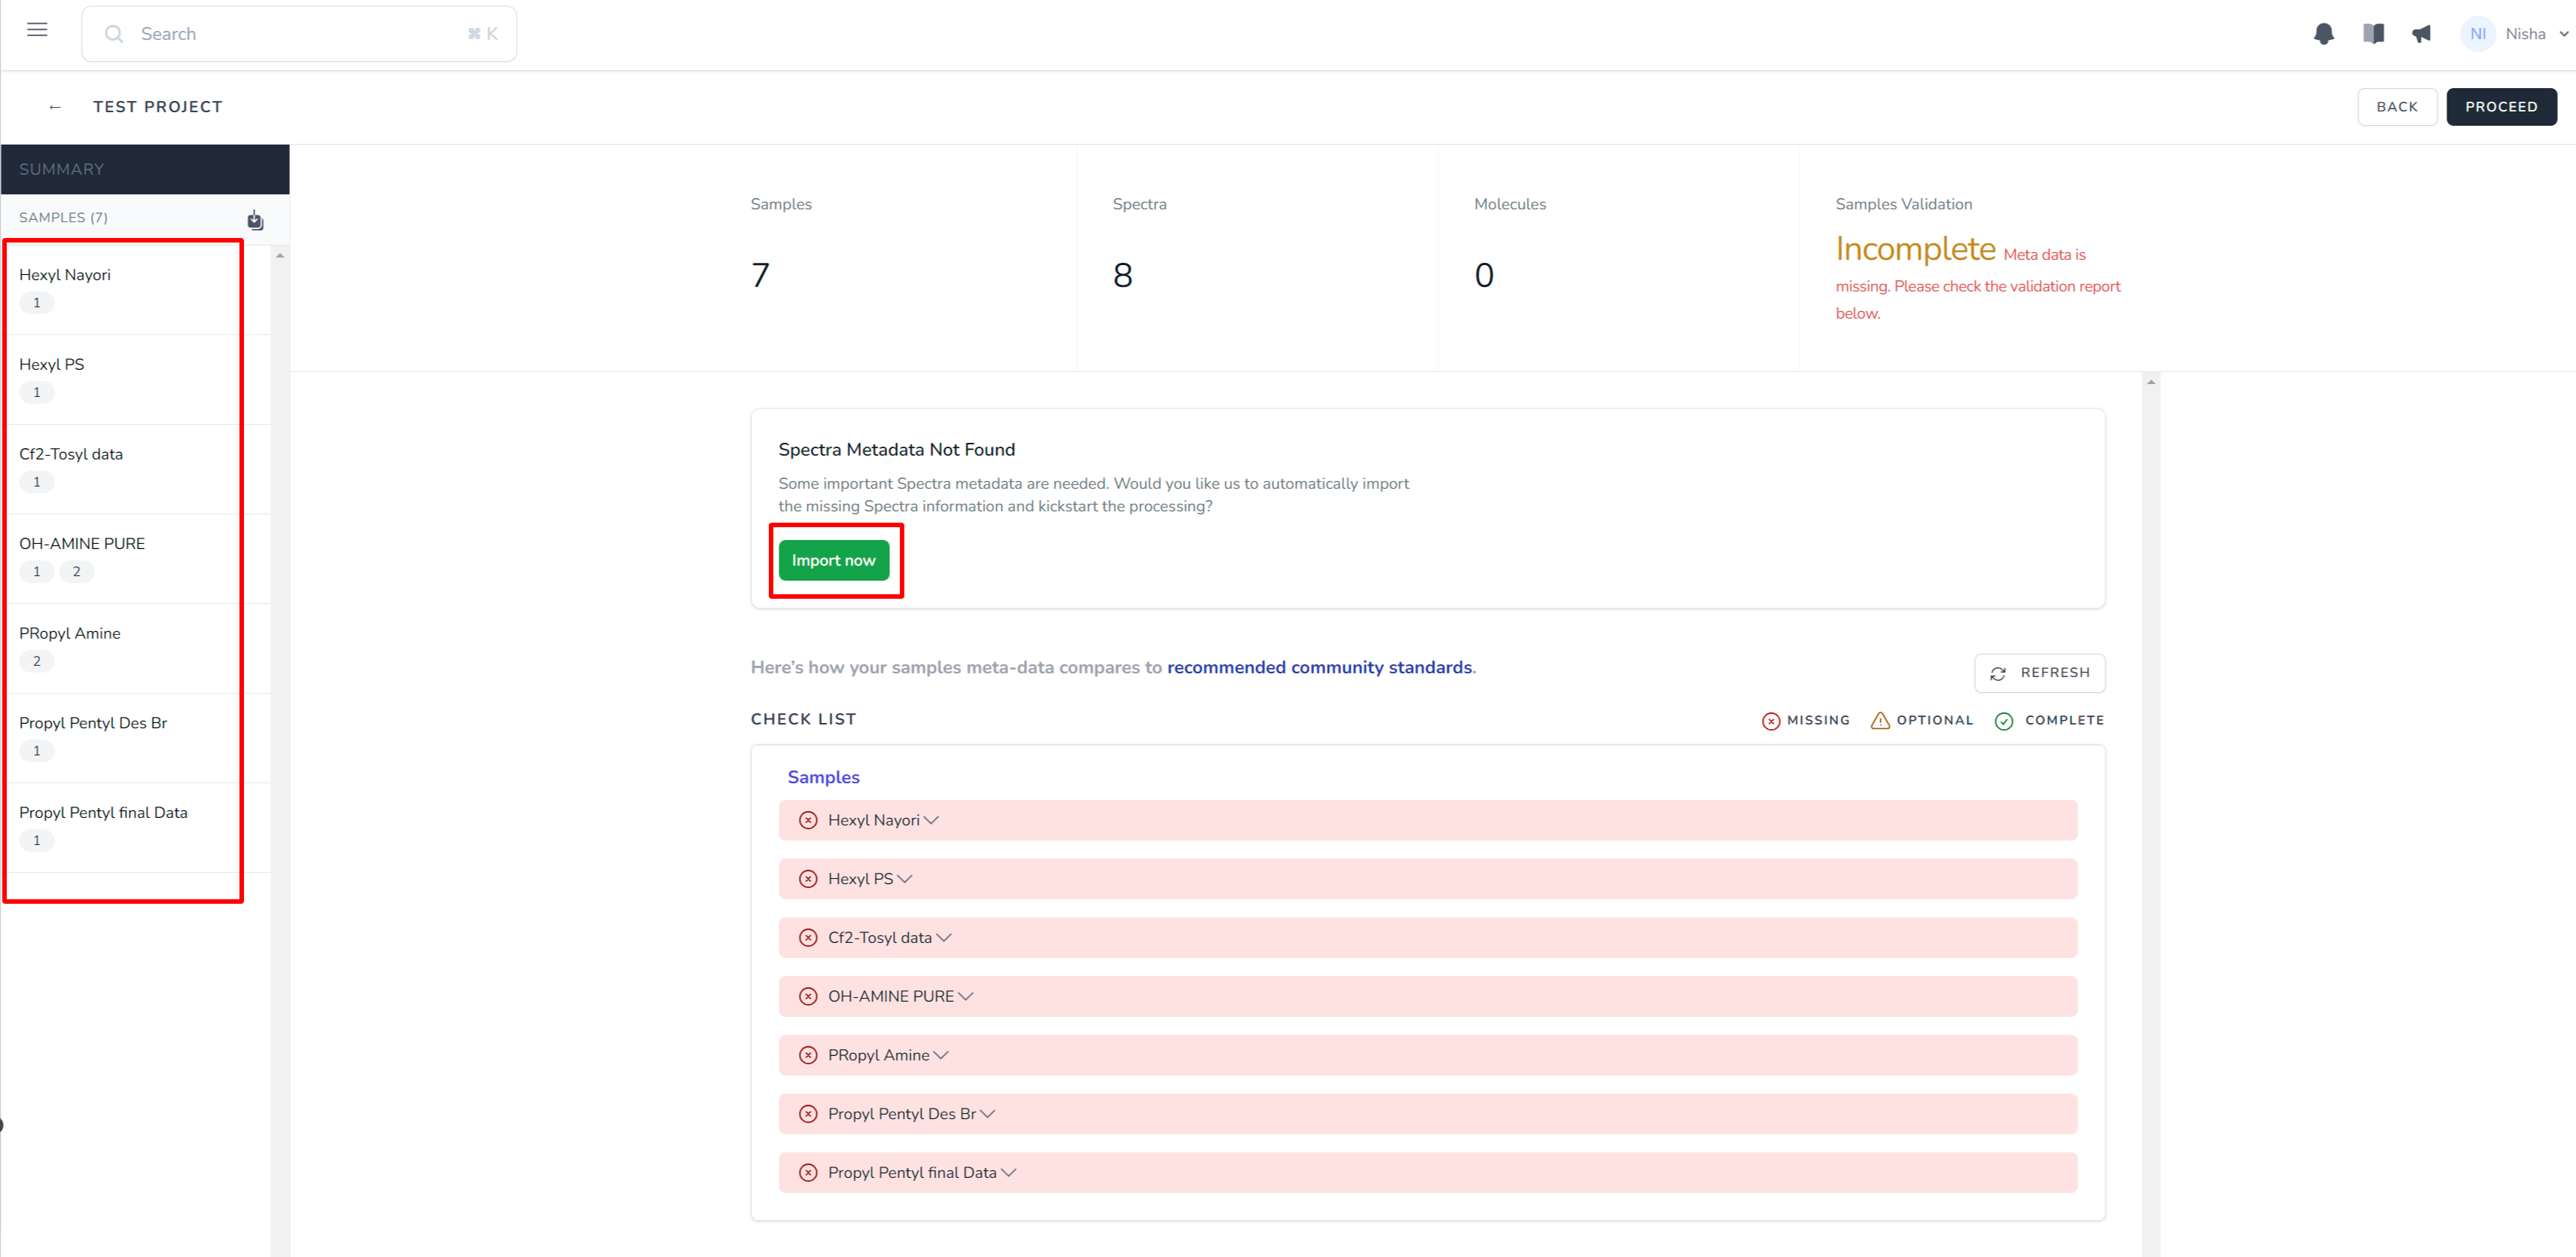
- To identify the missing information, click on each individual sample. This action will provide a comprehensive checklist of the required information that is currently incomplete. Here you can find either red (x) or green (✓) to indicate the existence or absence of the metadata respectively. Whenever the red (x) exists, it is accompanied by an
Editbutton to facilitate providing the missing data. Additionally, there are optional fields available for you to fill in, allowing you to provide additional information if desired.

- You can navigate through each sample by clicking on it to review the metadata. Additionally, you have the option to visualize and edit your spectra using NMRium and assign peaks to the corresponding chemical groups. For more details on how to use NMRium, please check its documentation.

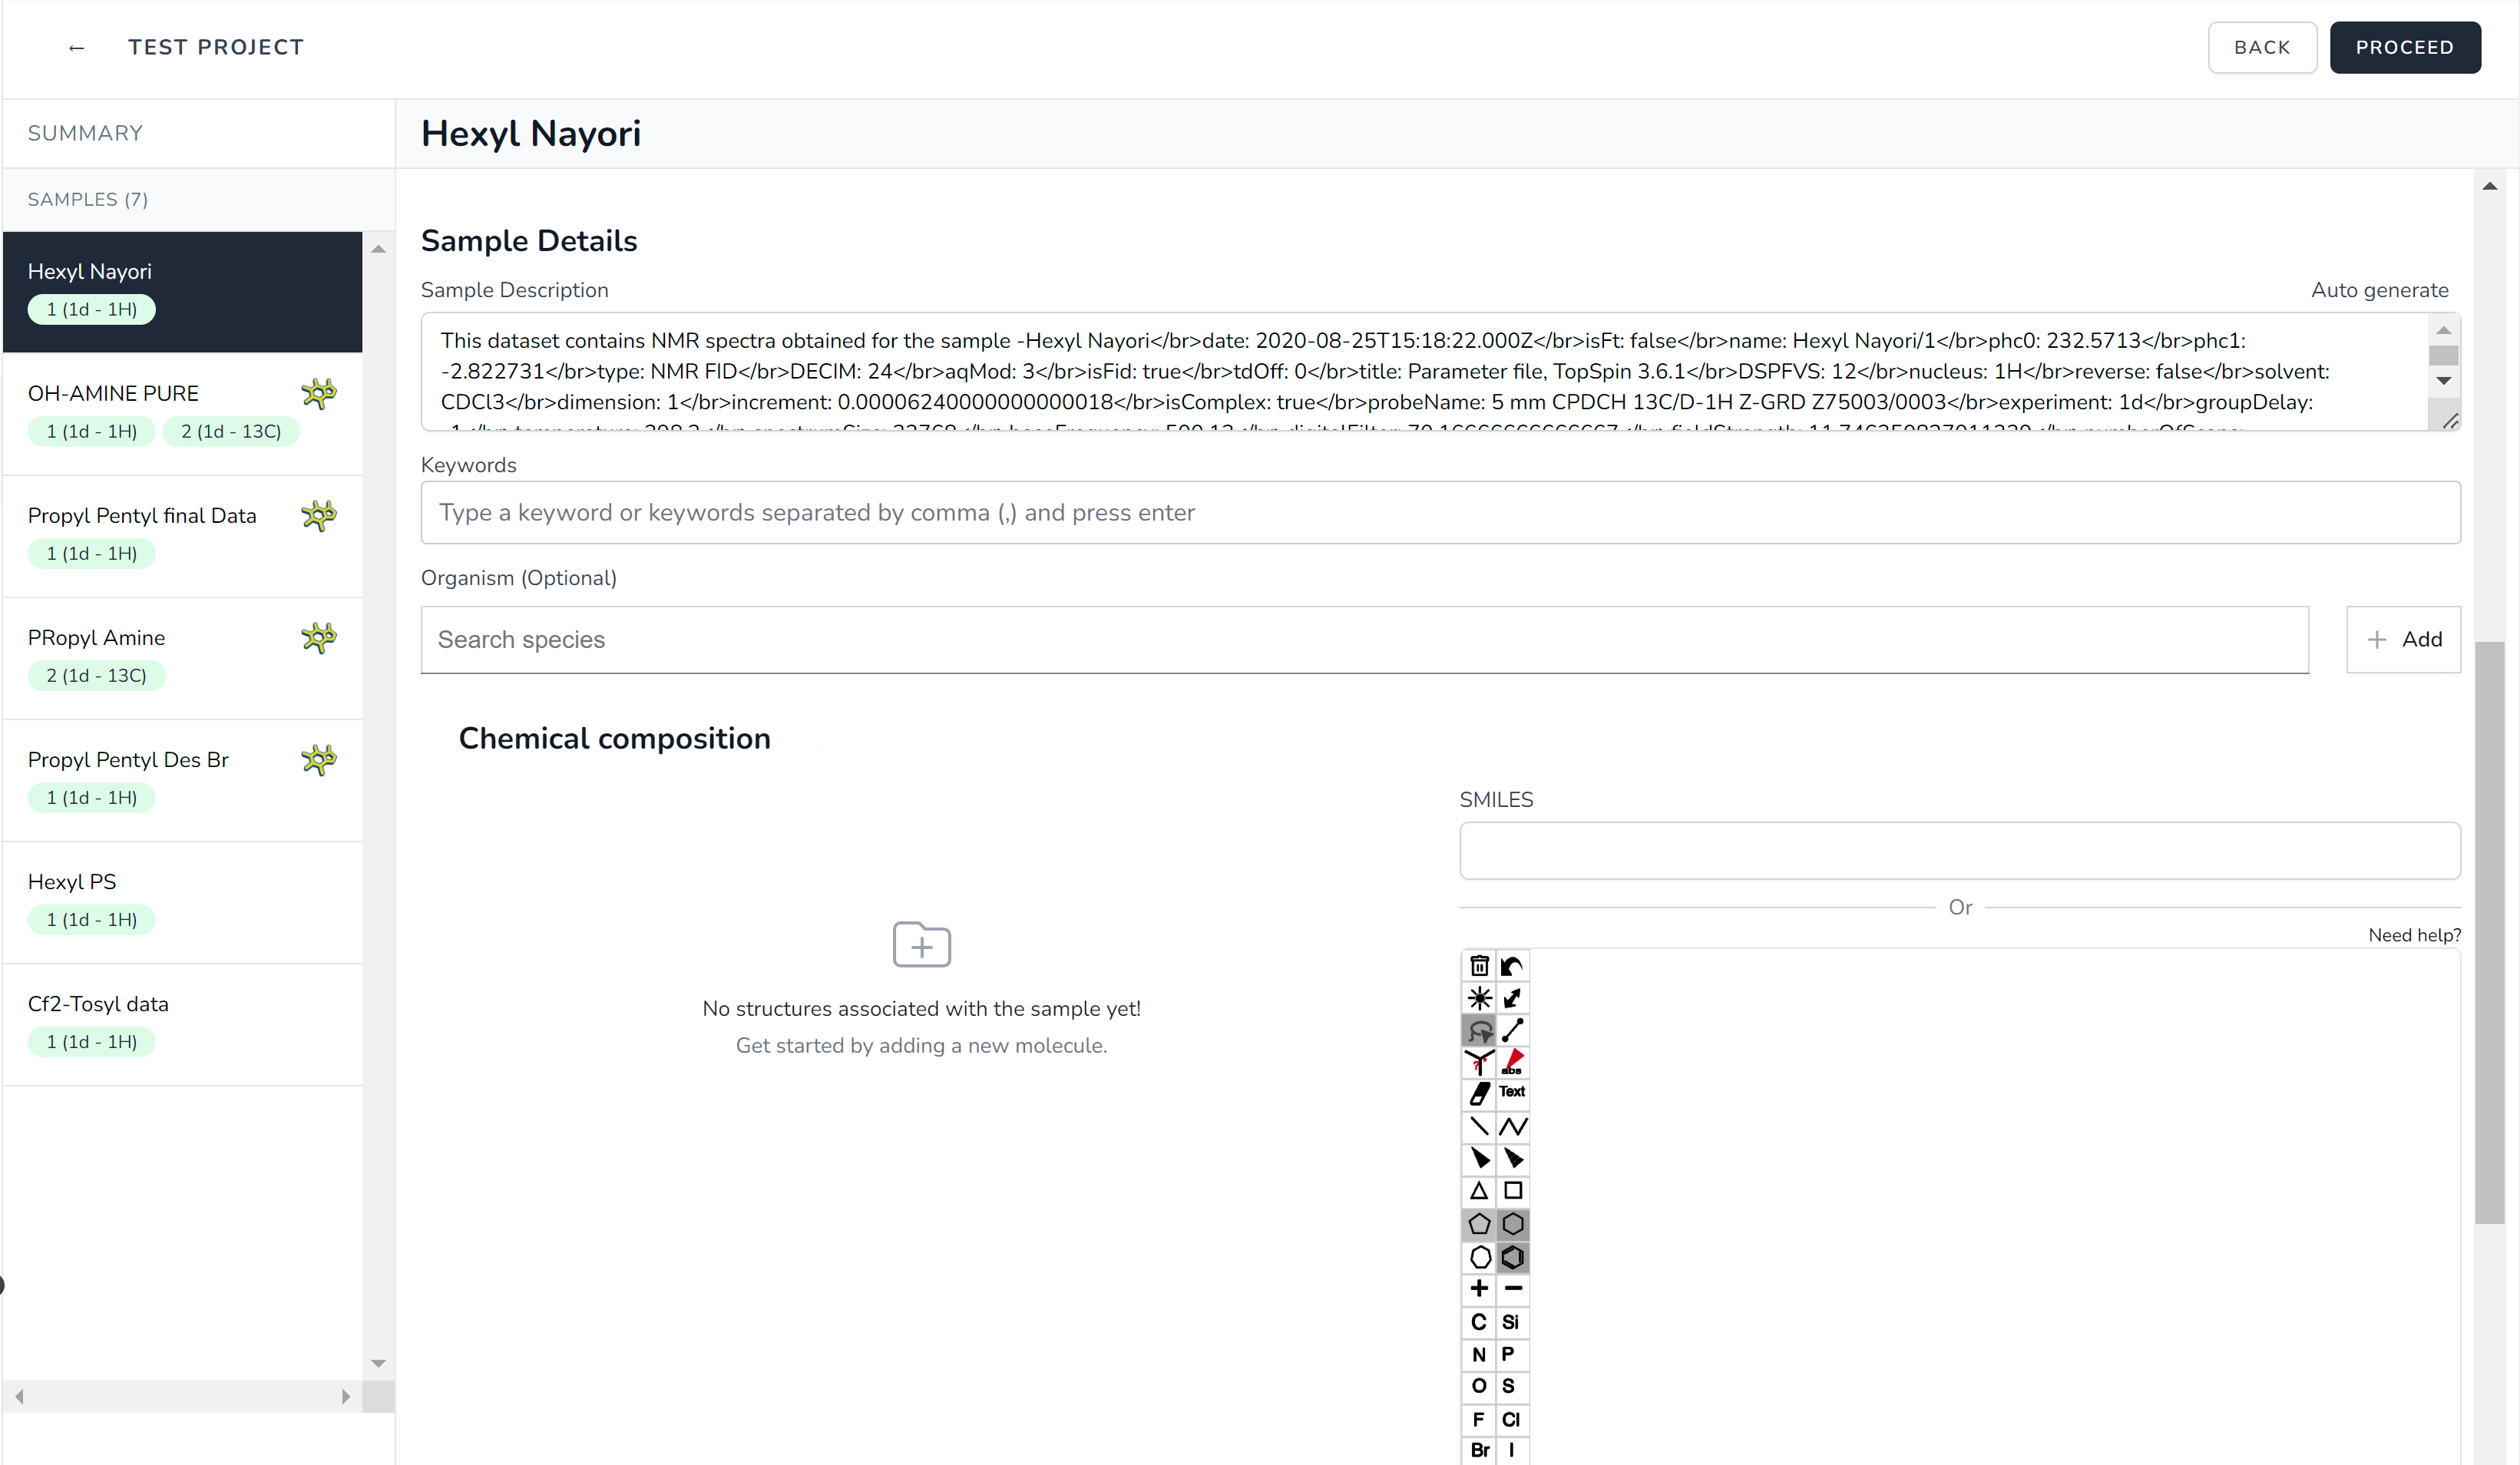
- On the same screen below you can find the Sample details which consist of:
Sample description- Automatically imported information provides a brief summary of the experiment and details on how it was conducted.Keywords- Tags used to search for the project and increase its findability.Organism- This is ontology driven organism information about your sample.Chemical composition- Molecule structure information existing in the sample along with their percentage. You can leave the percentage composition to zero if unknown. Click here for more information about how to use theStructure Editor.
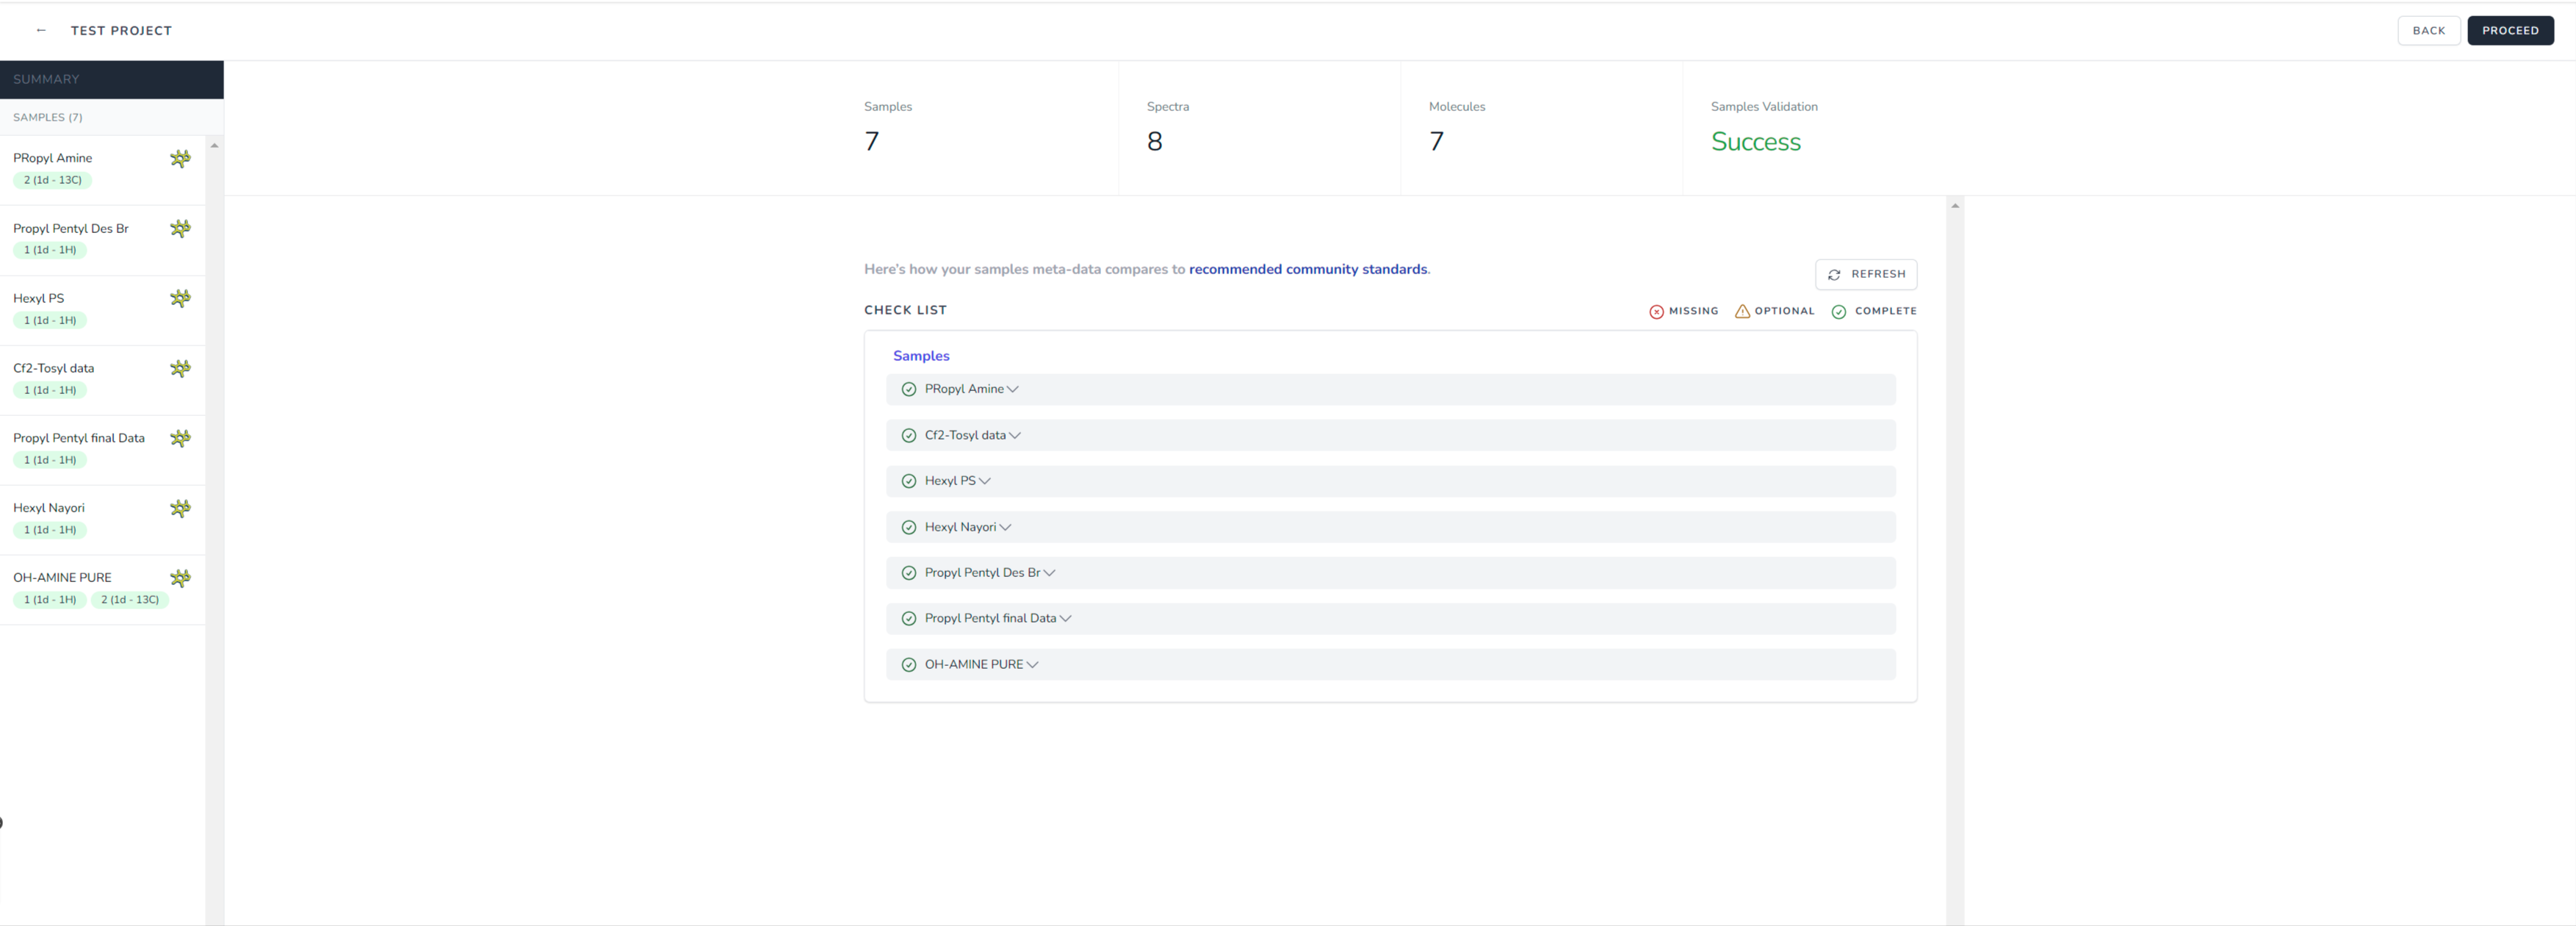
- After providing all the necessary metadata information, the
Validationstatus will change to Success and all the checklist items will be marked in green (✓). Click on theRefreshbutton if the validation status doesnot update. Click on theProceedbutton to move to the final step of submission.
A small clip showcasing the Step-2 of file upload process.
Step 3 - Publish data
You've reached the final stage of the submission process and you are almost there. At the top, you have the option to either publish the project as a
Projector simply publish theSamples, which you can find listed on this screen. If you choose to publish as aProject, you need to provide the necessary minimum requirements, such as:Project Name- must be unique within the workspace (personal workspace or team).Project Desription- must be at least 20 characters.Keywords(Optional)- this field is optional but can be added individually by typing the keyword and pressing "Enter," or in bulk by typing a list of keywords separated by commas and pressing "Enter." Keywords enhance the visibility of theProject.Organism(Optional)- this field is optional and is ontology driven organism information about your project.Citation- this field contains the article to which the submitted data is attached. You can either enter the citation details manually or import it directly from the DOI.Author- enter the details of the authors who are linked with the creation of the data. Again, these details can be entered manually or imported via ORCID IDsRelease Date- if you want to publish your data right away, you can leave this value as the default. Otherwise, you can choose any future date, and your data will be automatically published on that particular date.License- license is mandatory for making your data public. If you are not sure which license to use, please check the link How to choose the right license?.Terms & Conditions- please check the boxes if you agree to the Terms of Service and Privacy Policy of the nmrXiv and also please note once you publish your data, you are aware that your data including the underlying spectras and files will be made public.
Please be aware that once the project is made public, it cannot be edited any further and cannot be reverted to a private status.
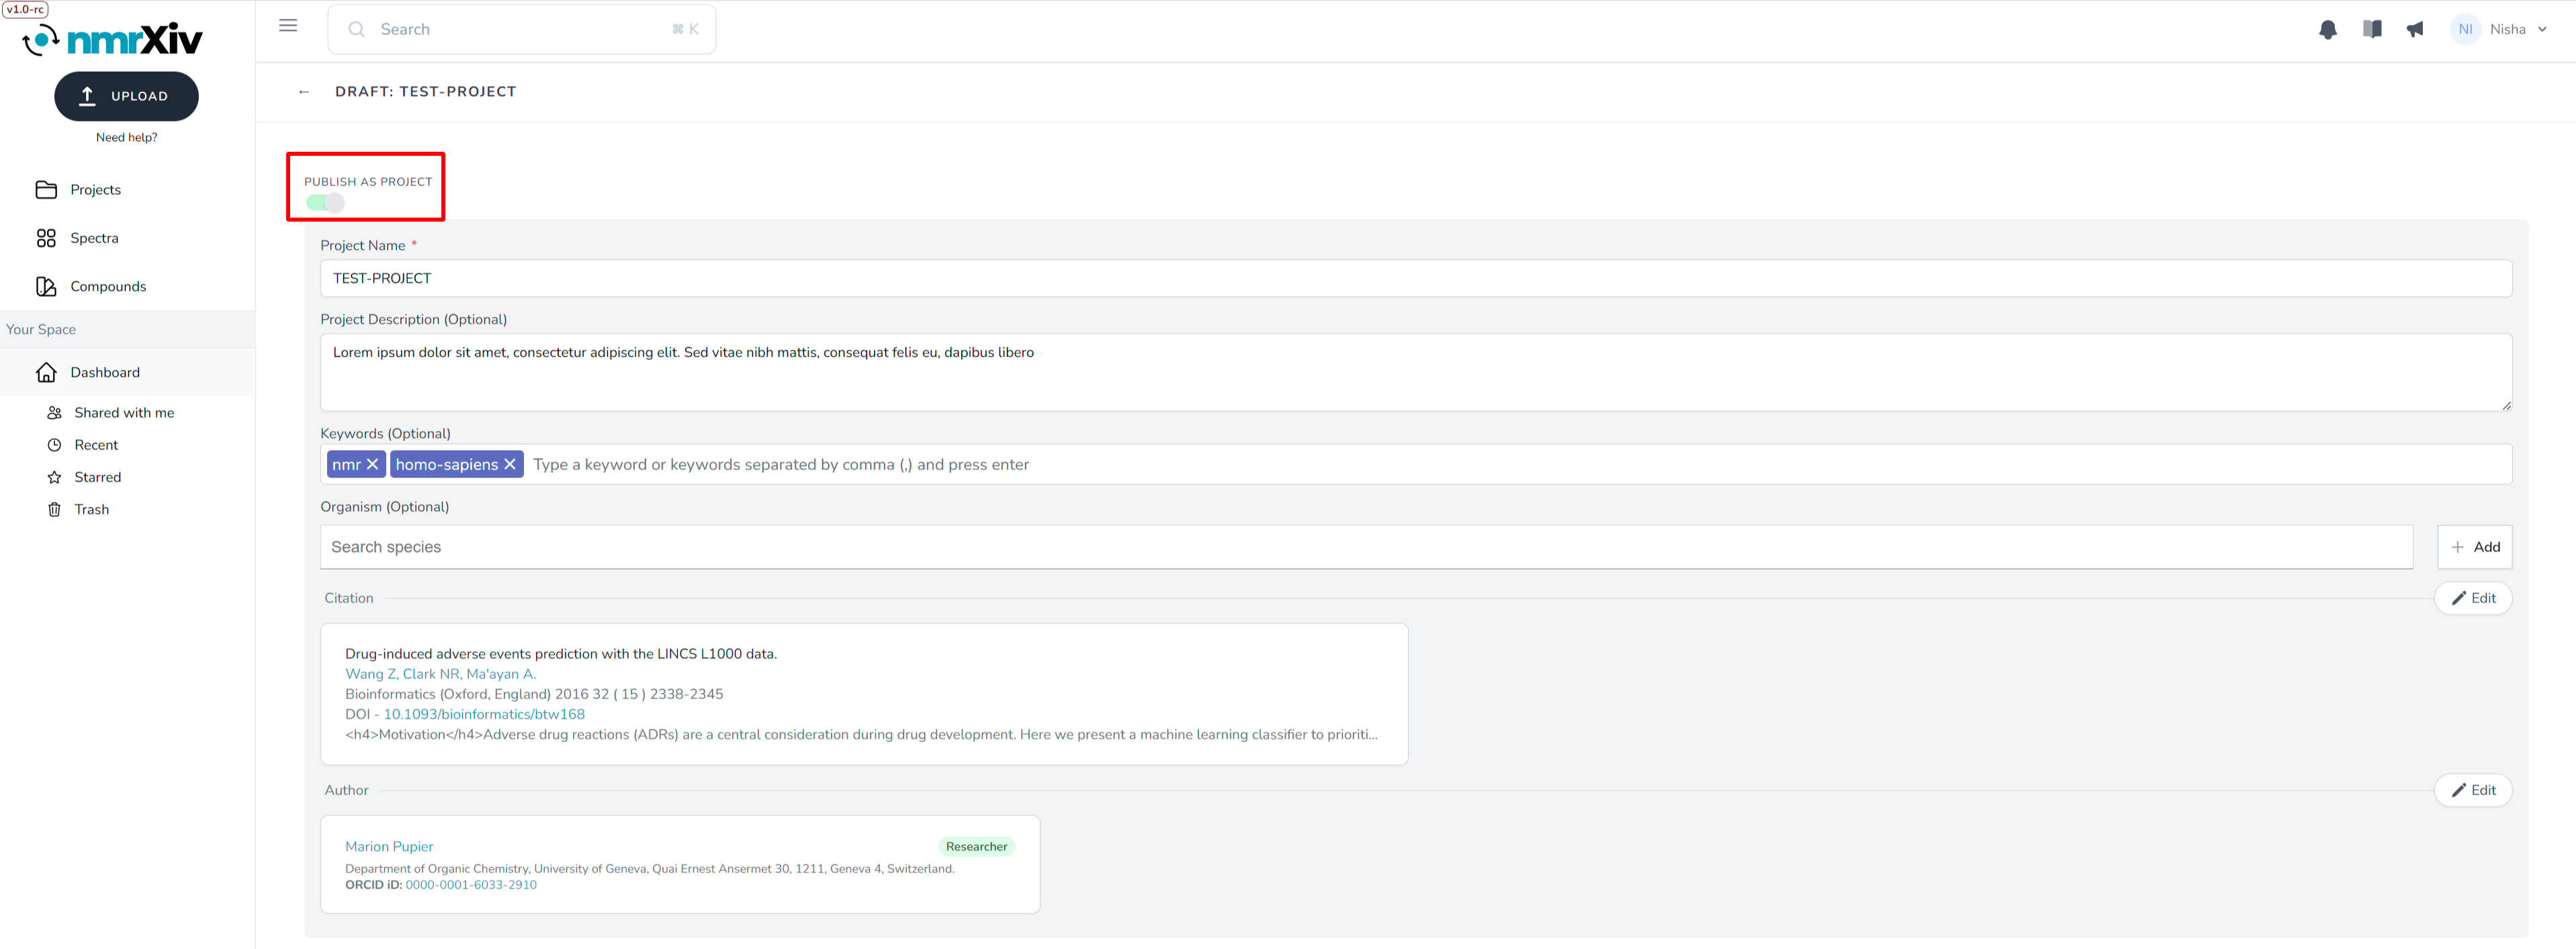
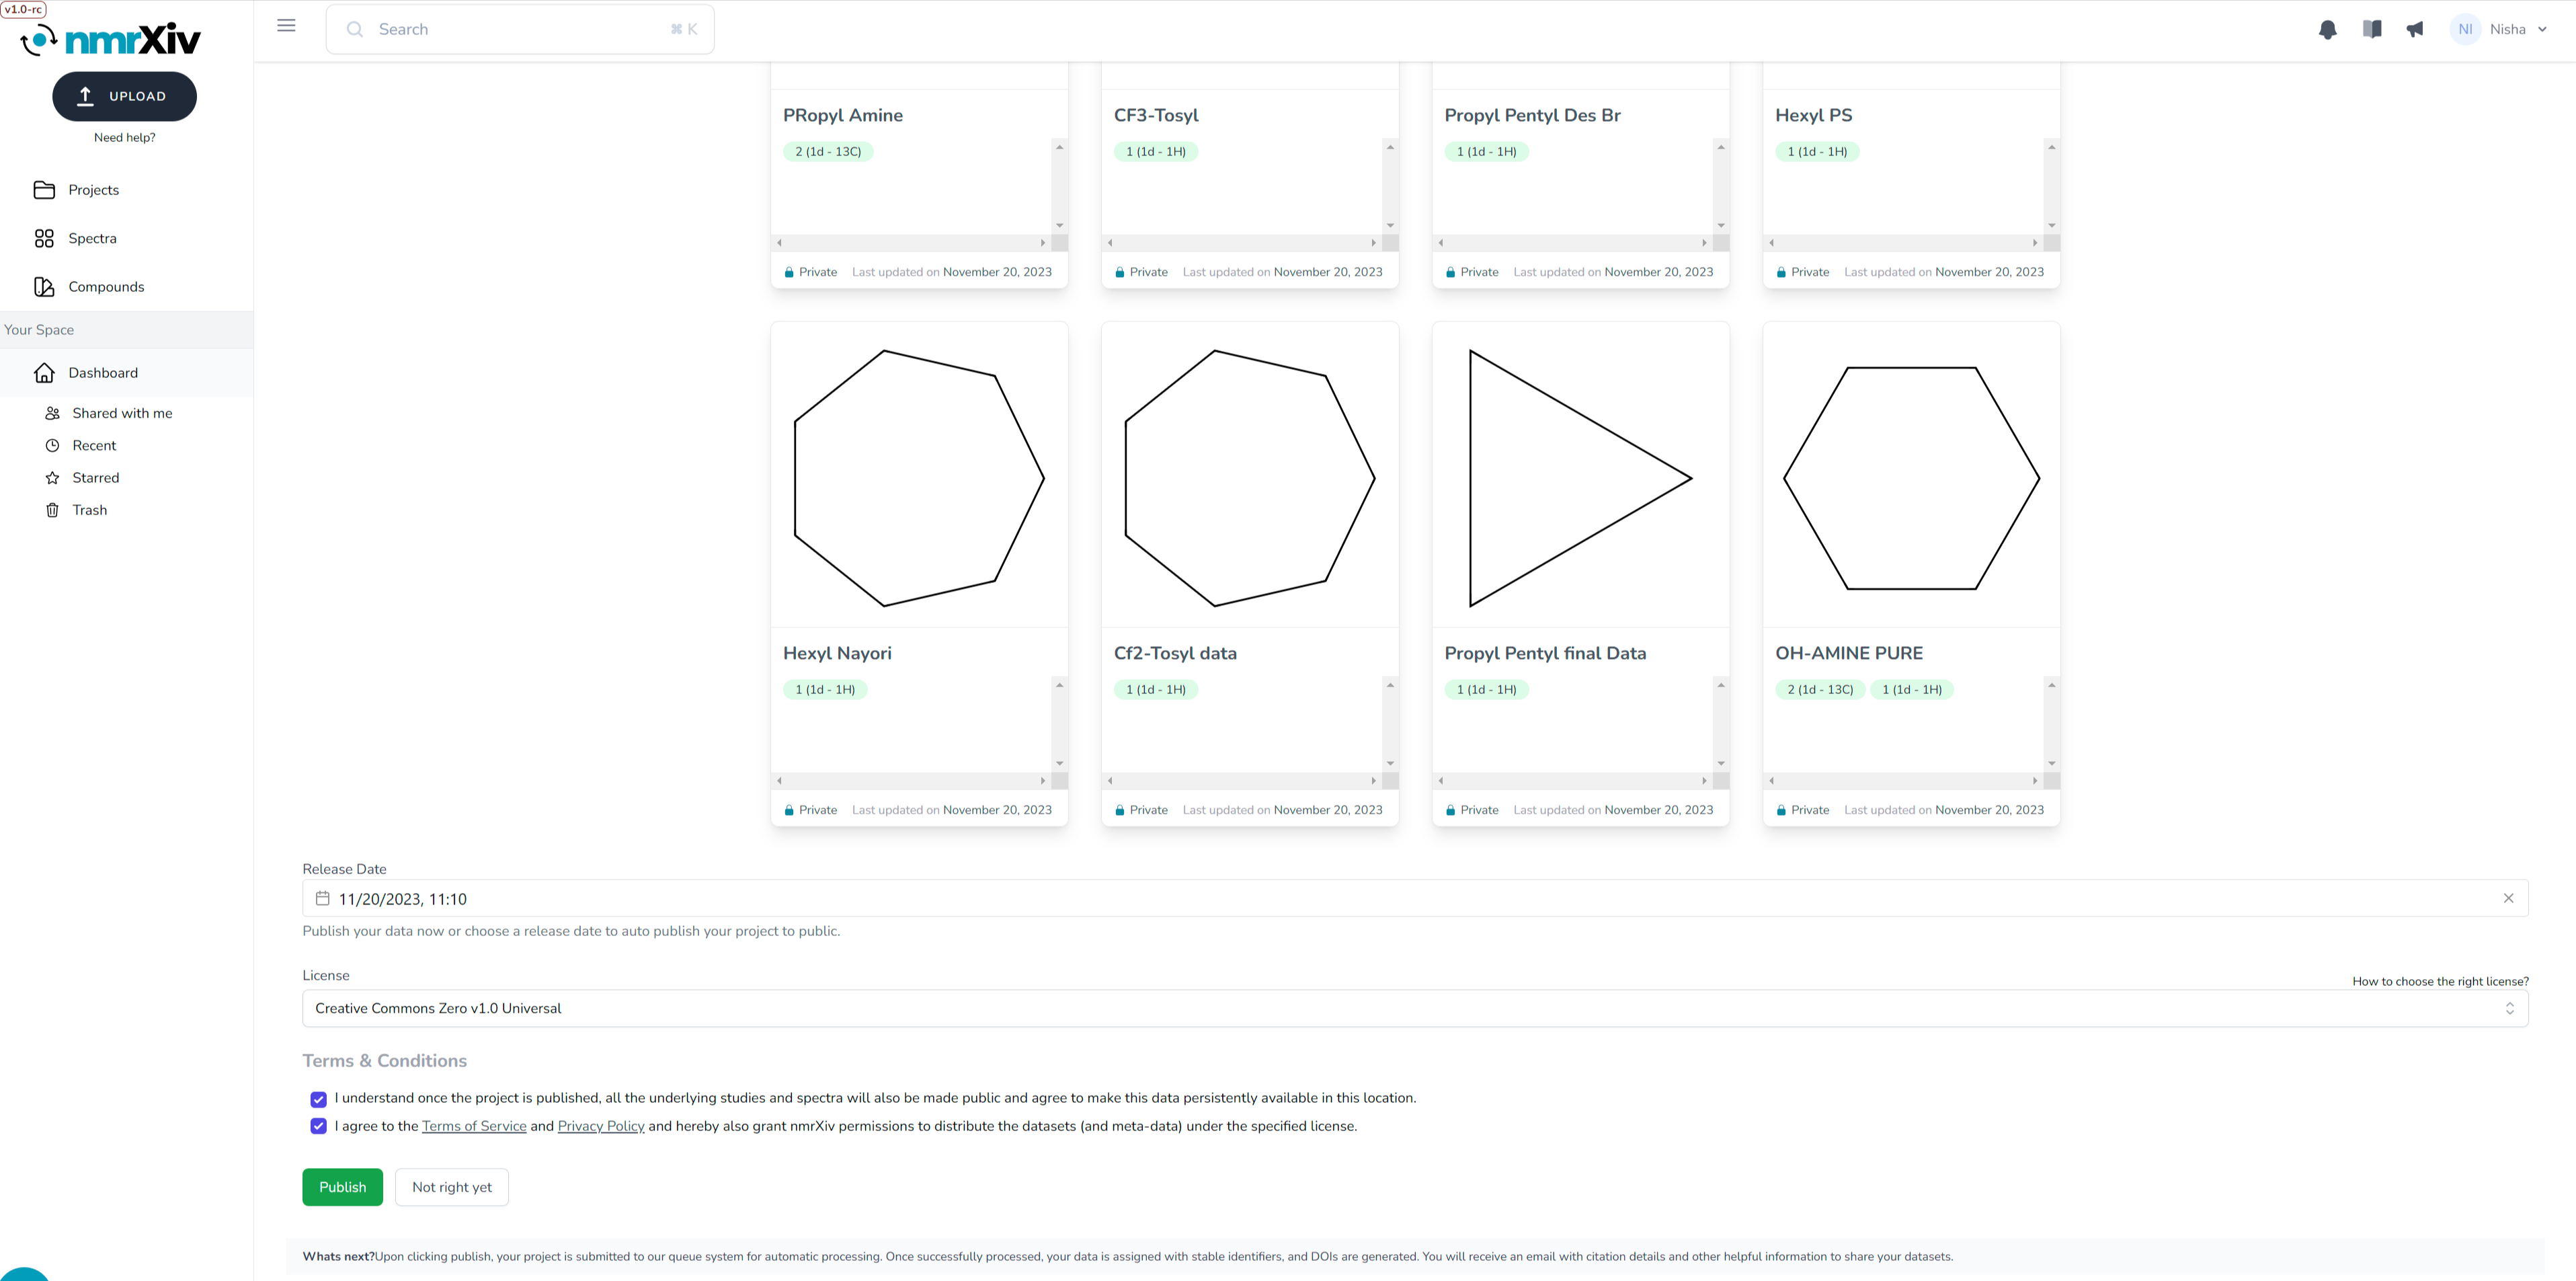
Once you have provided all the necessary information, you can click on the 'Publish' button. However, if you are unsure and wish to publish it later, please click on the 'Not right yet' button. This will take you to the dashboard, and your project will remain private. You can choose to make it public whenever you want in the future.
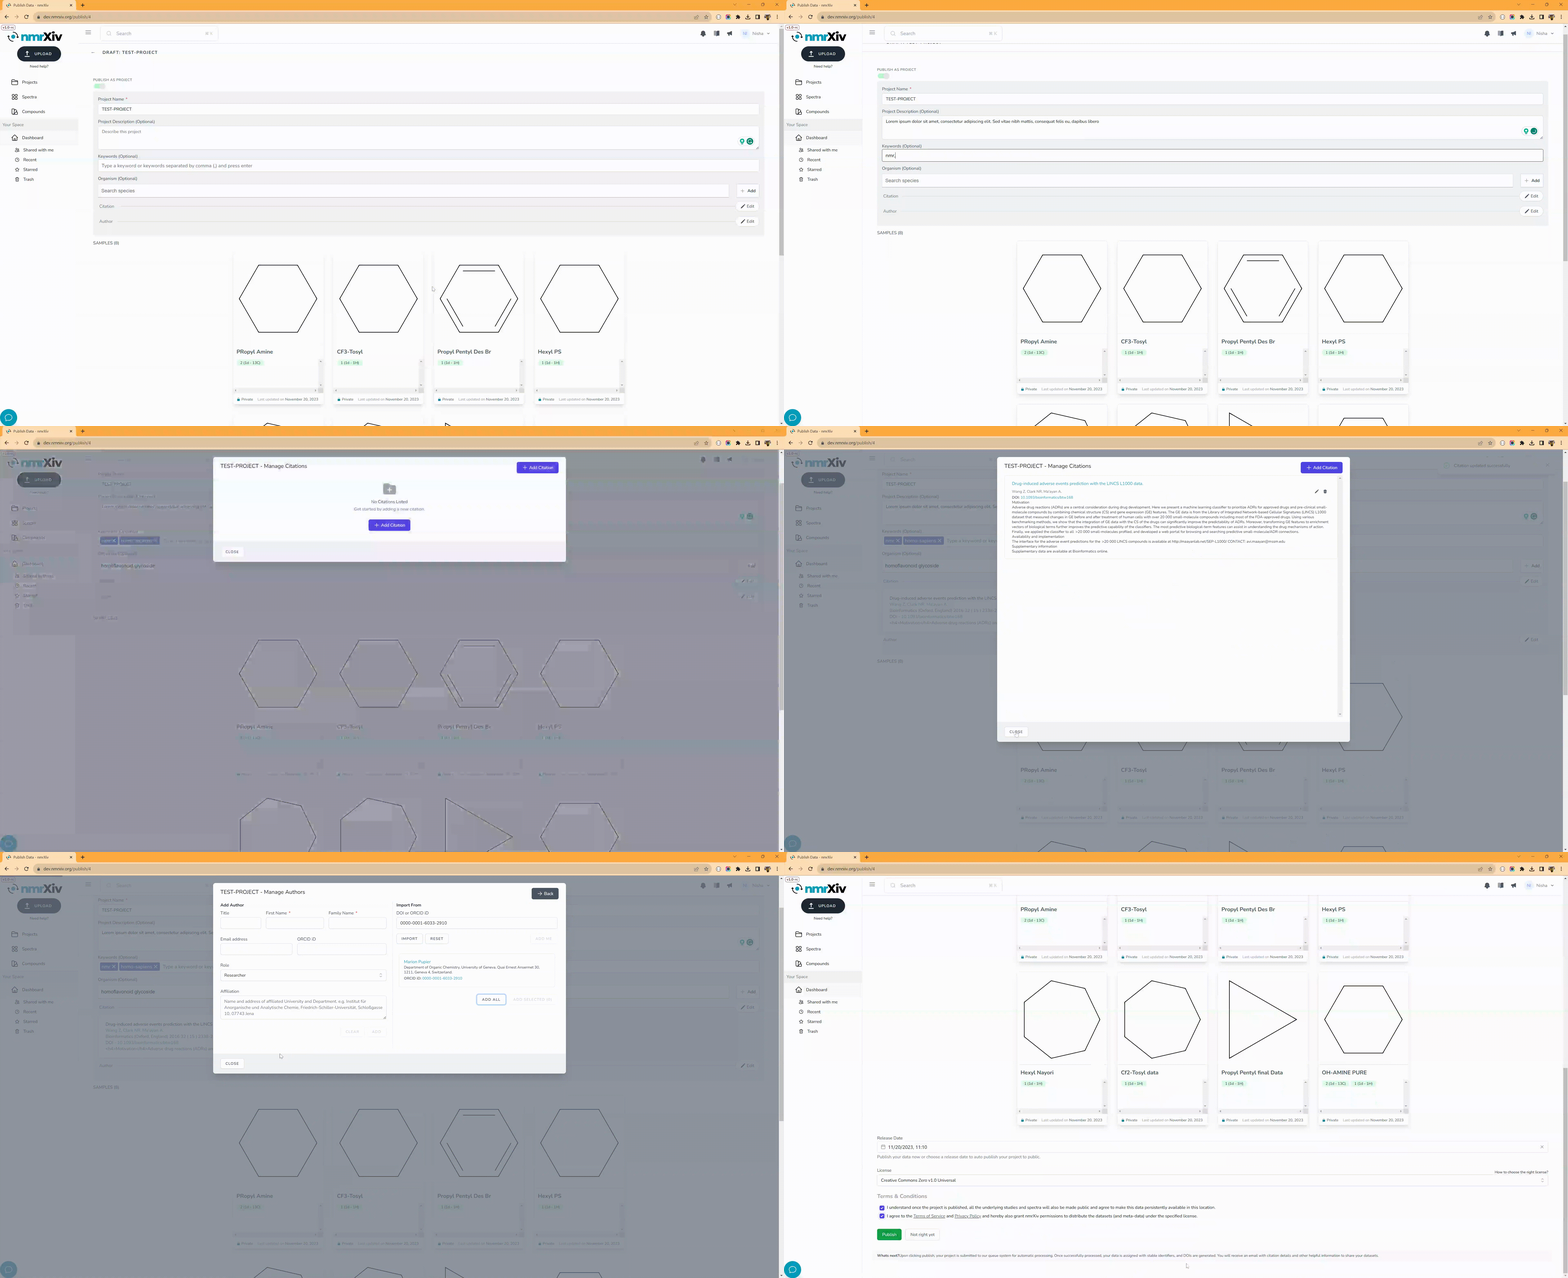
A small clip showcasing the last step of file upload process.
After completing the final step of the submission process, you will be directed to the dashboard about which you can find more details in the next section.
WARNING
Please note that all the clips and screenshots are taken from the development environment of nmrXiv. Kindly note that this serves as a demo/test server for nmrXiv, and we urge you not to upload or save any sensitive data. For real-time data uploads, please visit https://nmrxiv.org.

