Project
The concept of project in nmrXiv is similar to the Investigation one in ISA model. Therefore, the project helps to group related samples and describe their collective metadata. How those samples are related is up to the user. They can be a collection of samples used for teaching or in a thesis. They can also be a part of one Investigation (several samples from one source). In other words, the relation can be based on the domain of the samples, their usage, or any other basis, as long the user is aware that all the data submitted to nmrXiv in one process are grouped as one project.
Project View
Private Project View
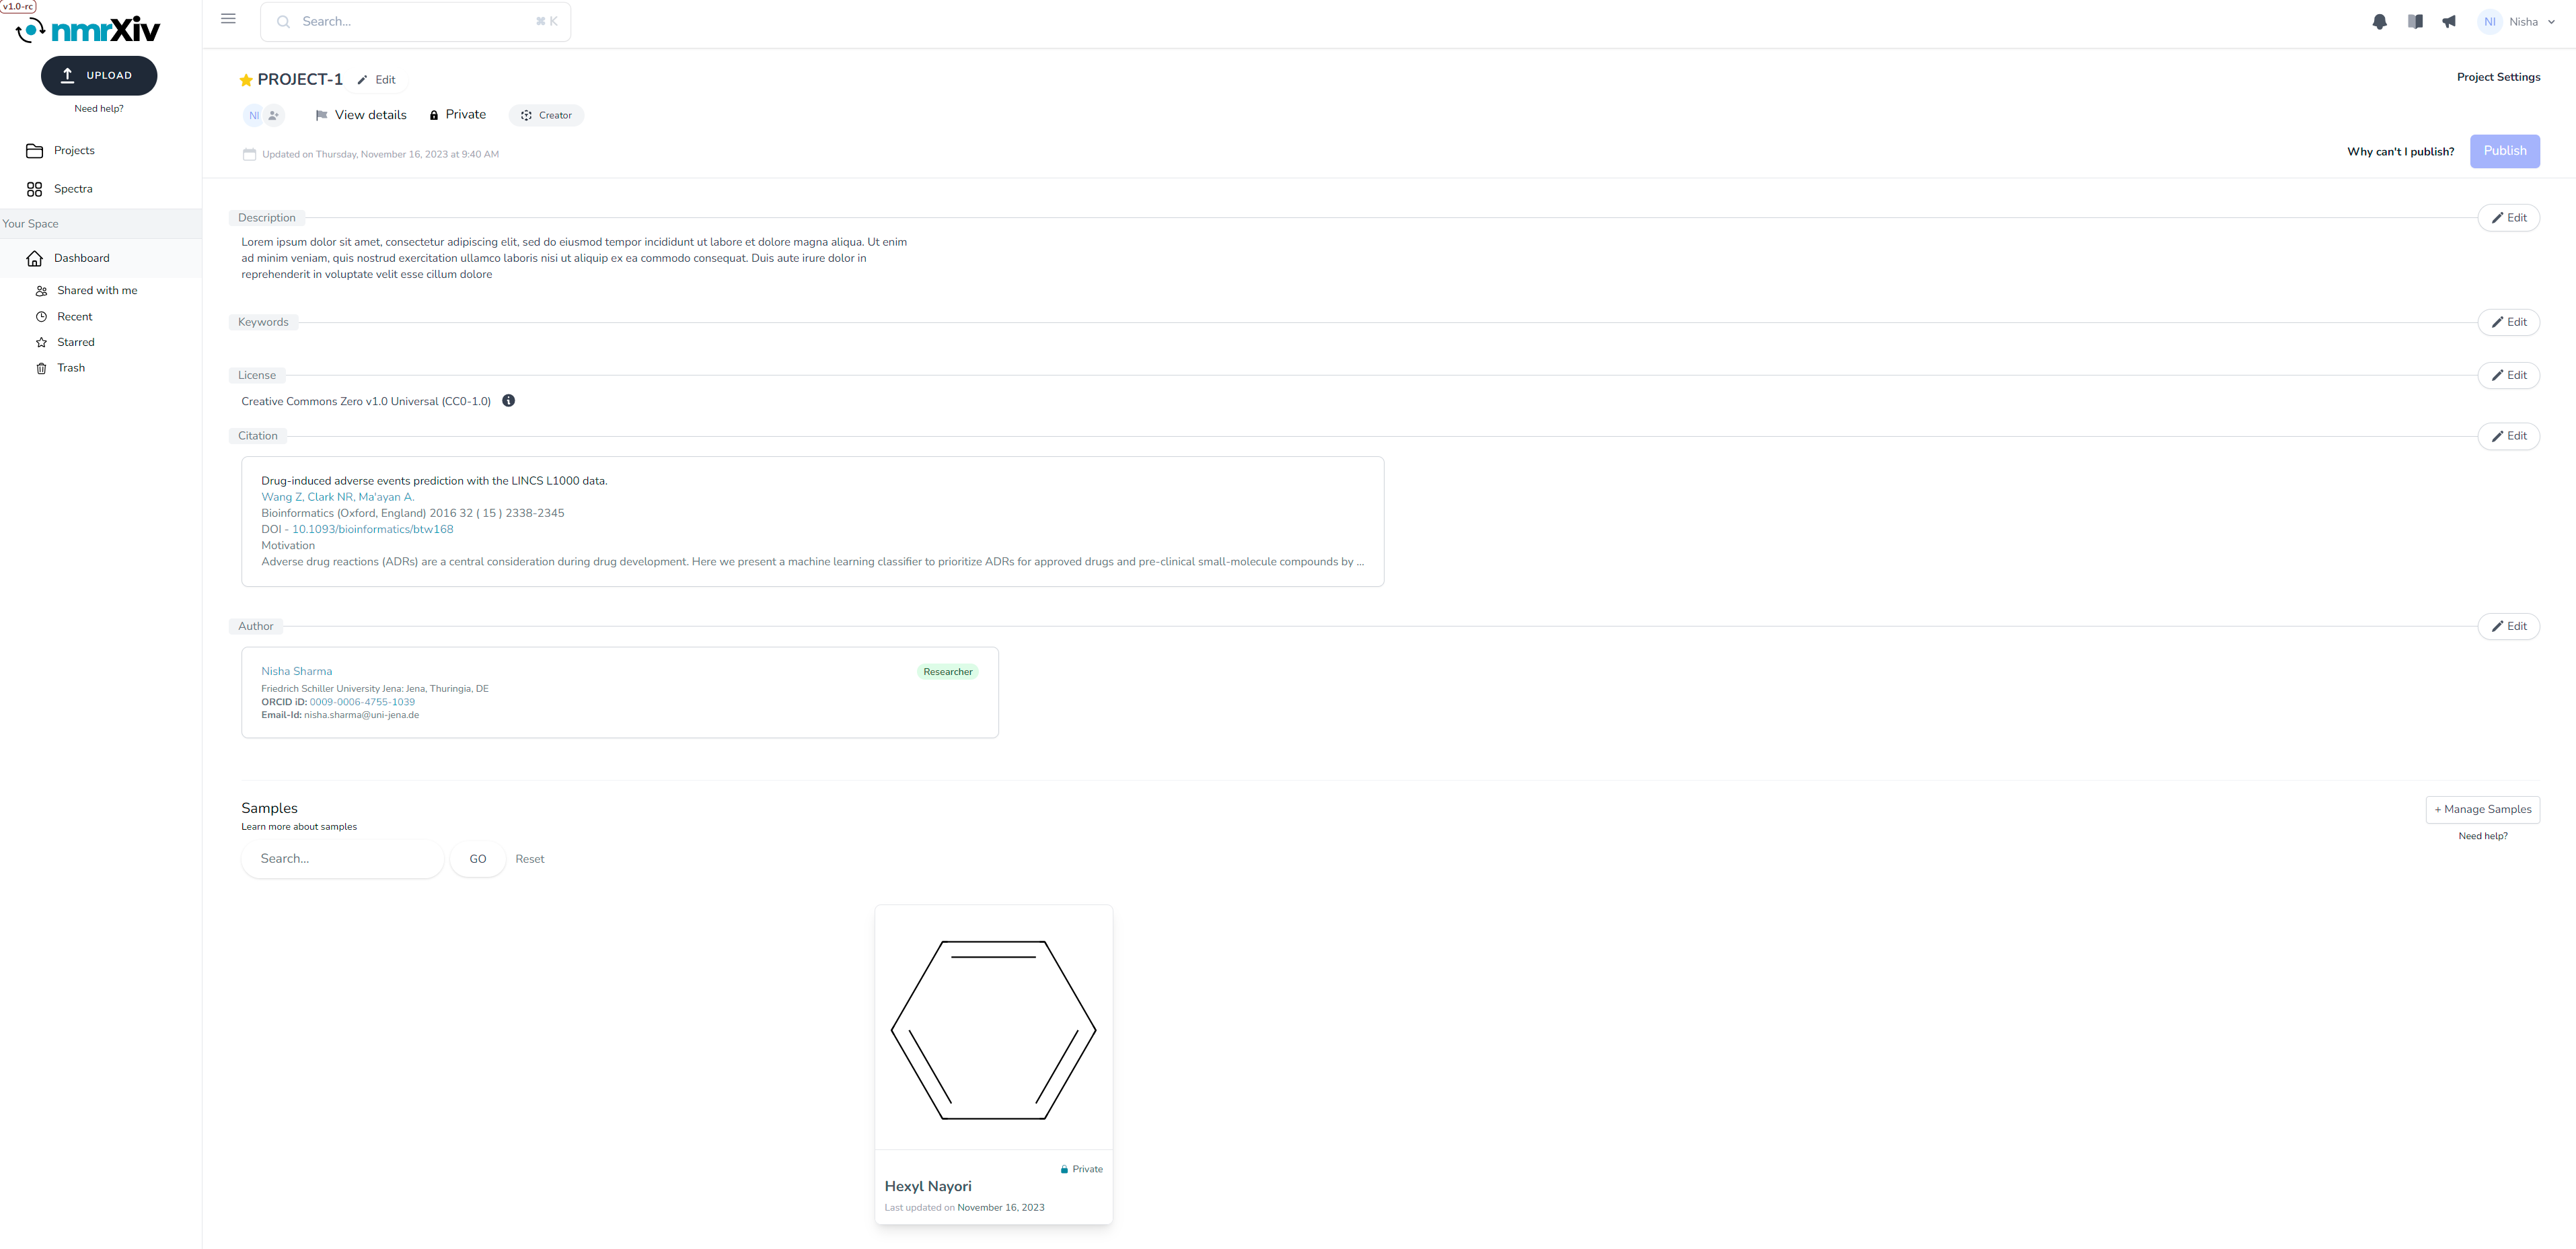
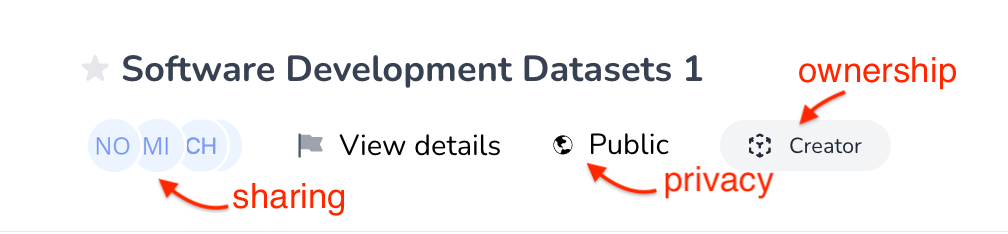
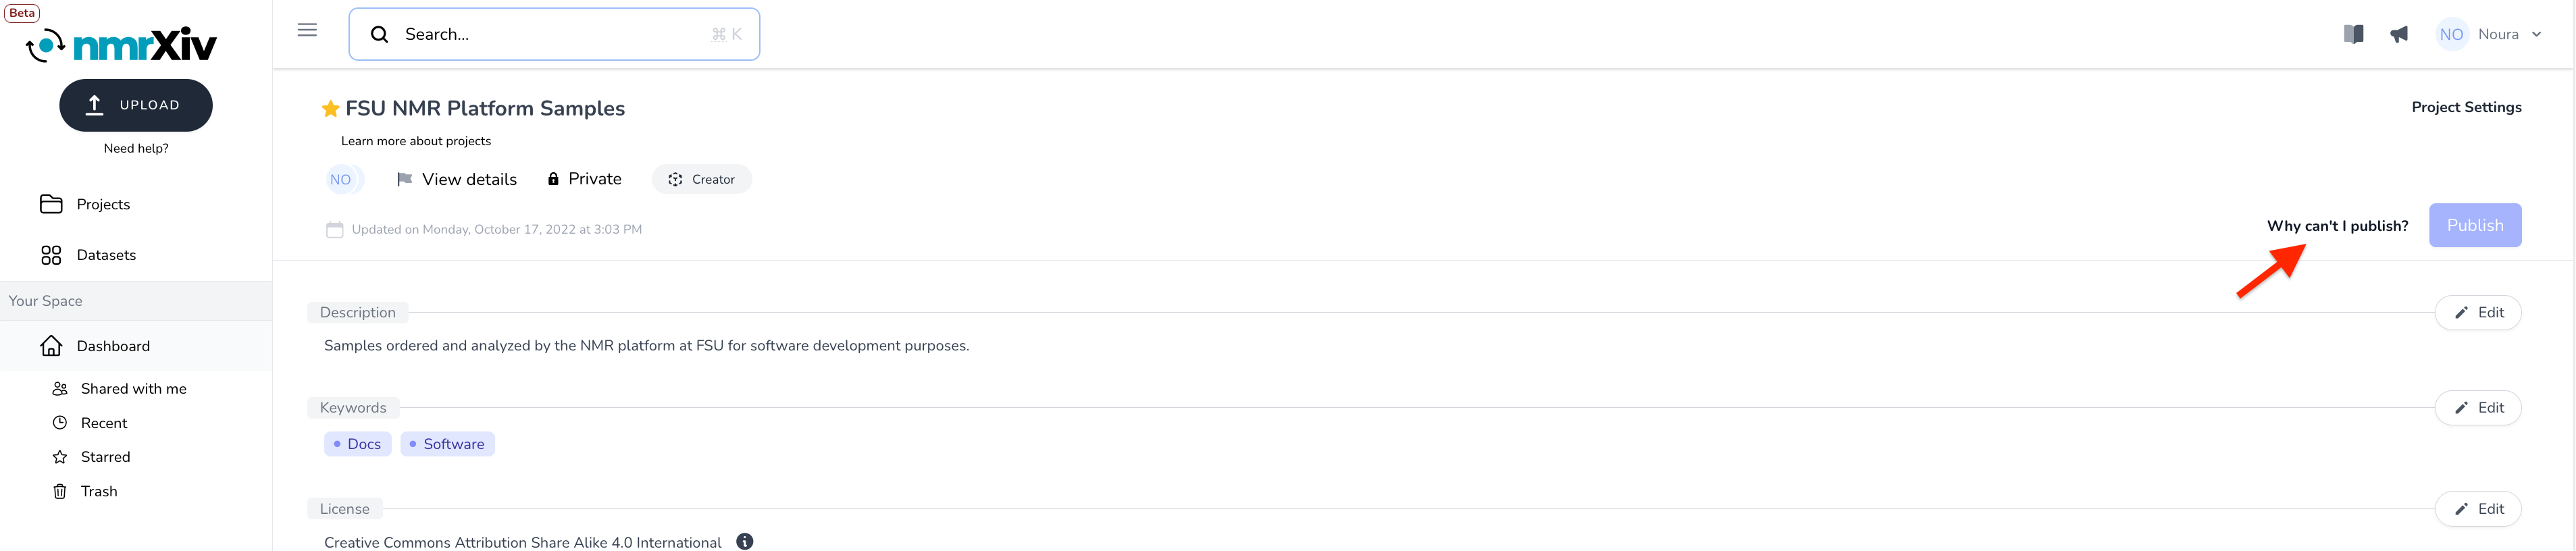
Starting with private projects, from the top, one can see the project name (PROJECT 1), which must be unique within the workspace. Next to the name is a star to indicate whether the project is starred and to enable starring/de-starring, which helps to bookmark projects. Below, one can see the avatars of the users with whom the project is shared as circles with either the users' images or names' first letters. Clicking on those avatars enables sharing control (more on that in Share). One can also click on View details to view and edit the project details (more on that in Edit), and to see the project's privacy and the user's ownership. Both those last two are not clickable, but they are editable from View details and Share. And finally, there are details about when the project was last updated.
To the right, there is the Project Settings (more on that in Delete), and the Publish button. This button remains inactive as long as the data validation fails. To get more details on the failing validation and to fix it, the user can click on Why can't I publish?, which leads to the validation page (more on that in Validation).
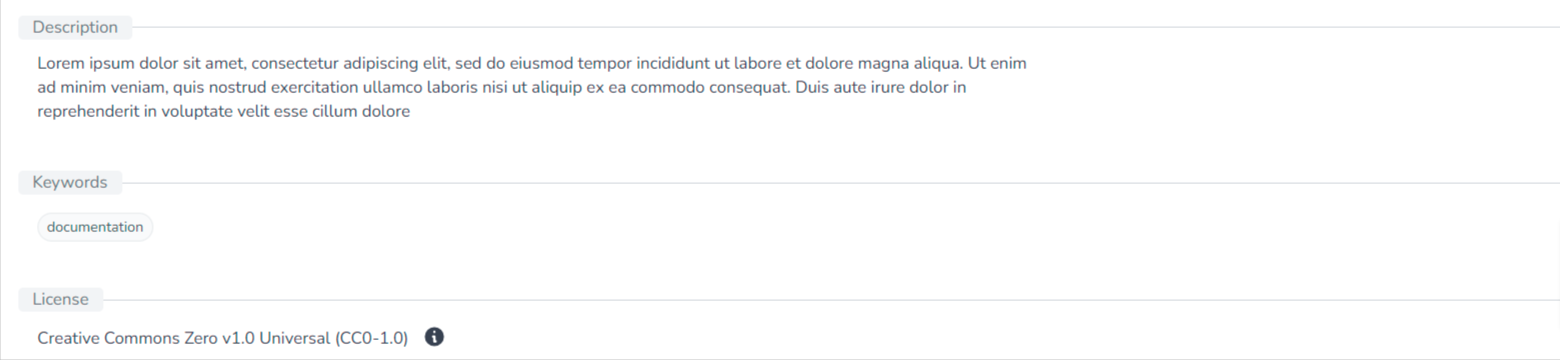
Moving down, the view of the private project differs from the public one by having the Edit buttons next to the fields in the earlier one. Those fields include the project's Description, which must be at least 20 characters describing its content and/or its purpose, while the Keywords are tags used to search for the project and increase its findability. Then comes the License with an information sign. When hovering over the i, a brief description of the license appears. More about nmrXiv licenses can be found here
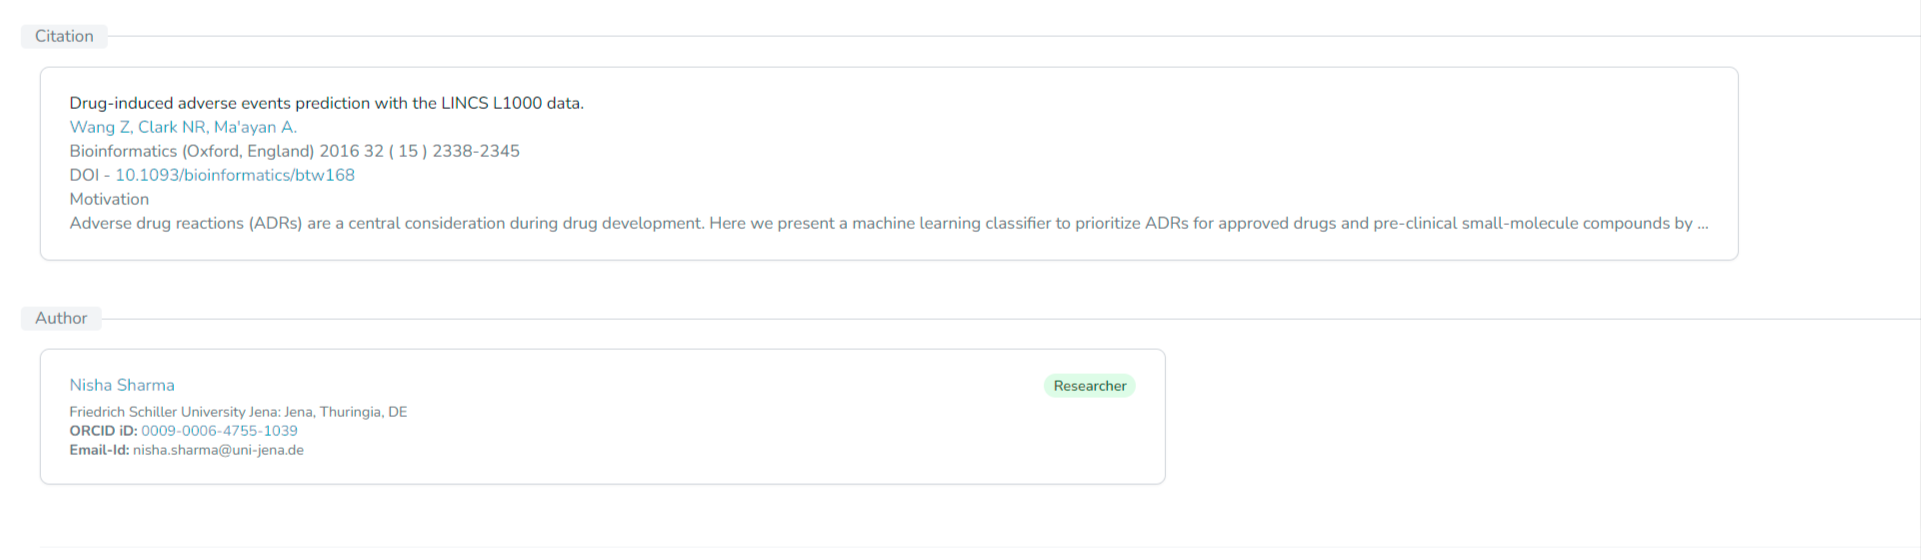
The Citation field contains the article to which the submitted data is attached, and the Author is the creator(s) of the data.
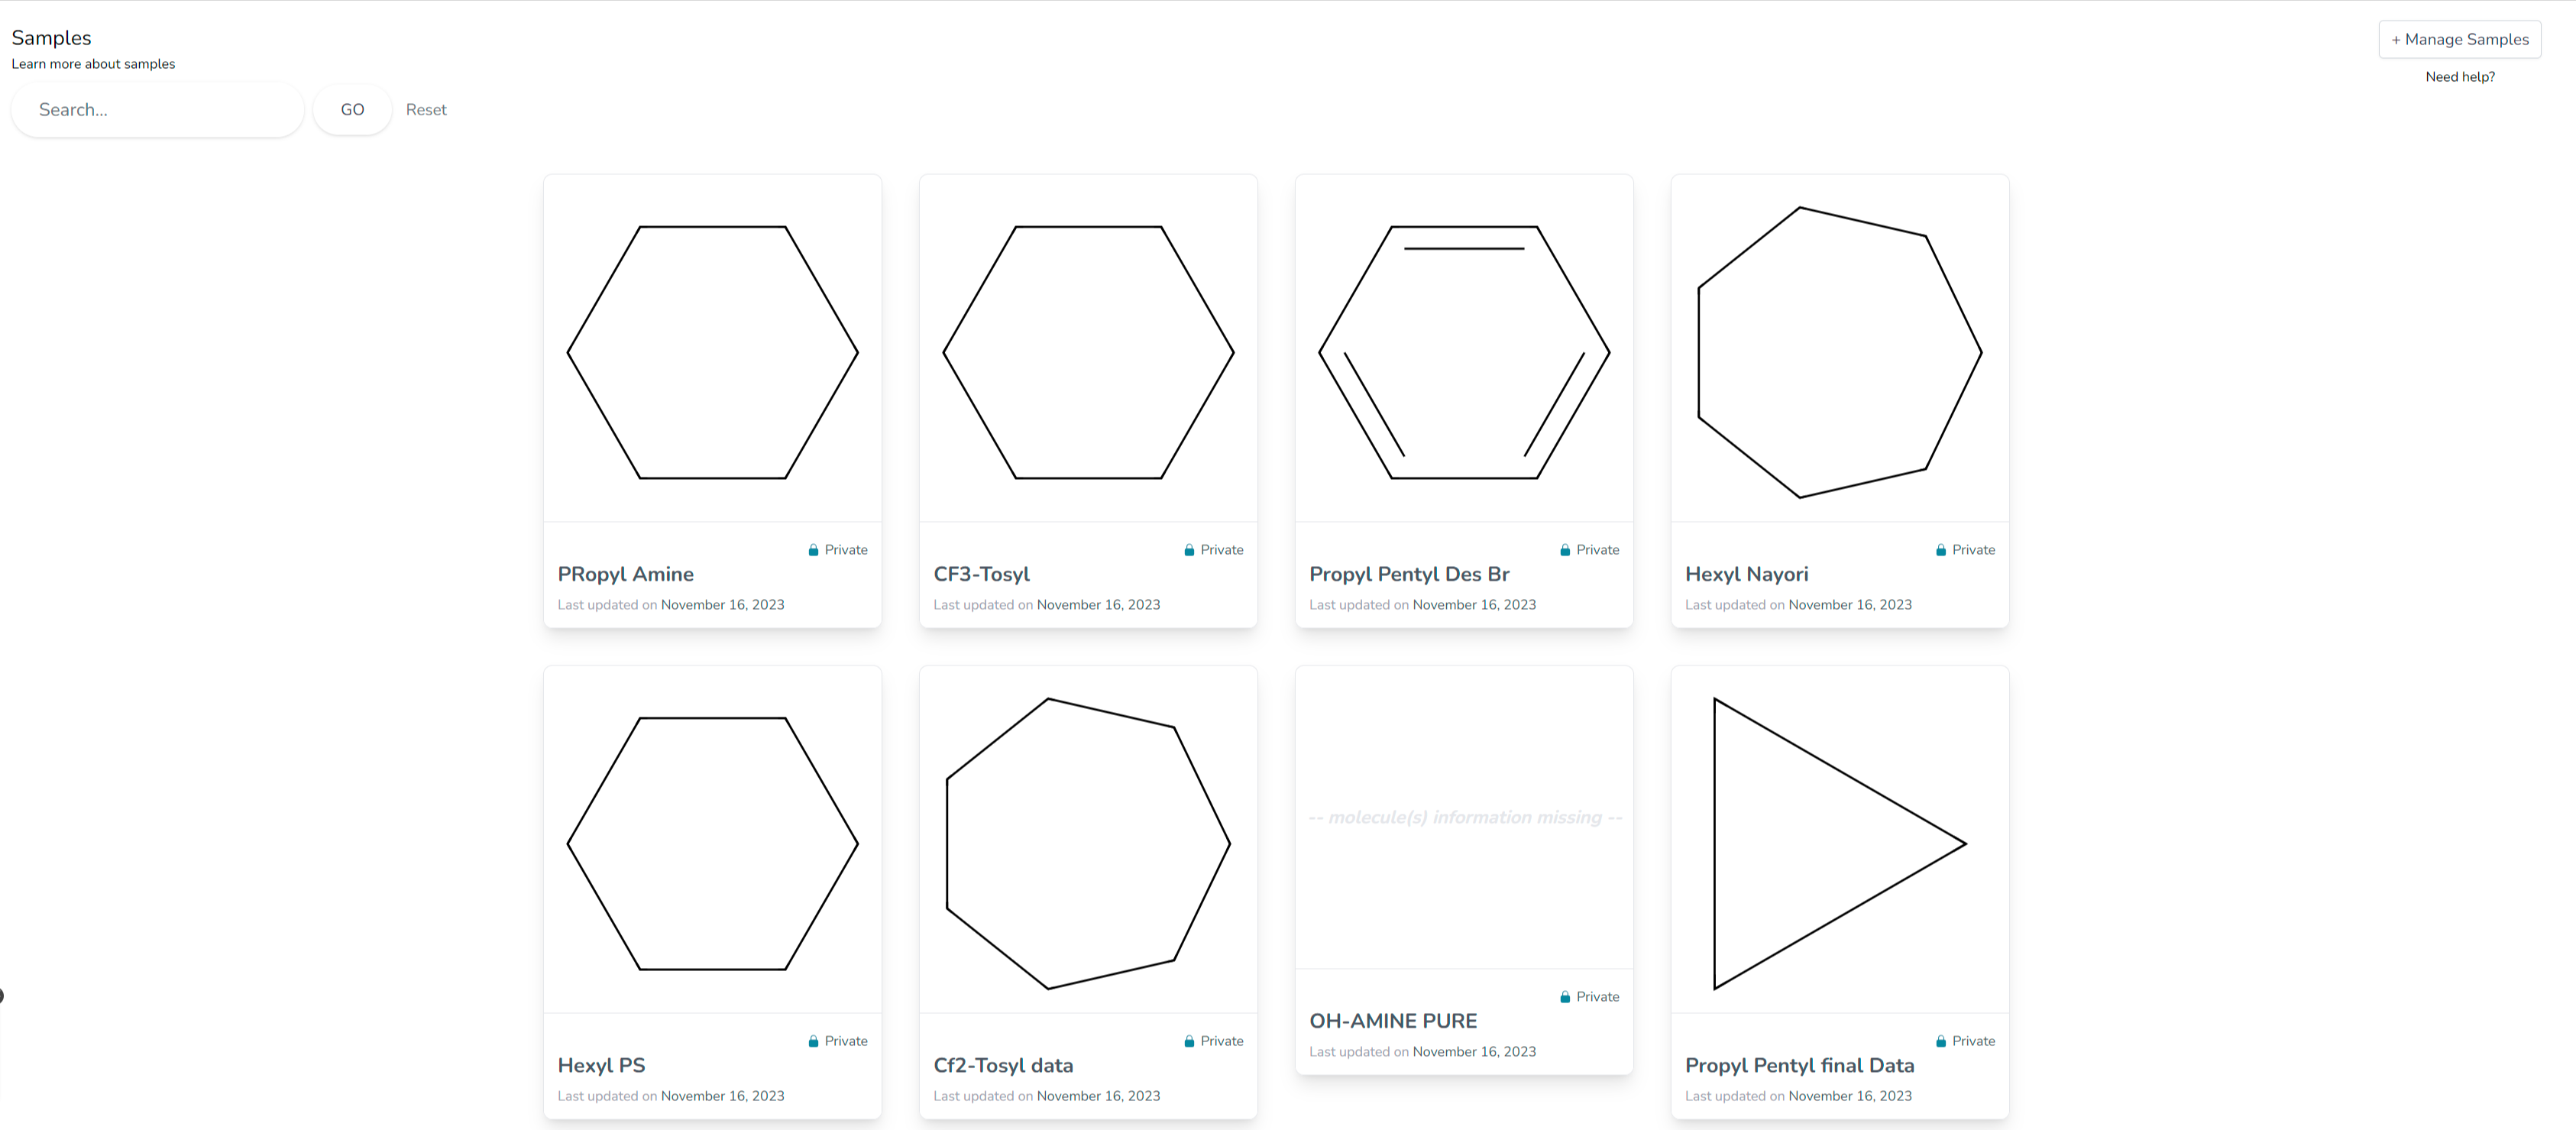
At the bottom are the samples included in the project supported by the Search bar. At the moment, only the search "by the name" is supported. To search for a study, you need to provide at least a few consecutive letters of its name. The search is case-insensitive. Pressing GO takes you to the search results, while Reset will takes you back to a view of all the samples. To the right, there is a Manage samples button, which enables adding and deleting samples to and from the project. For more details, please check Manage samples.
Public Project View
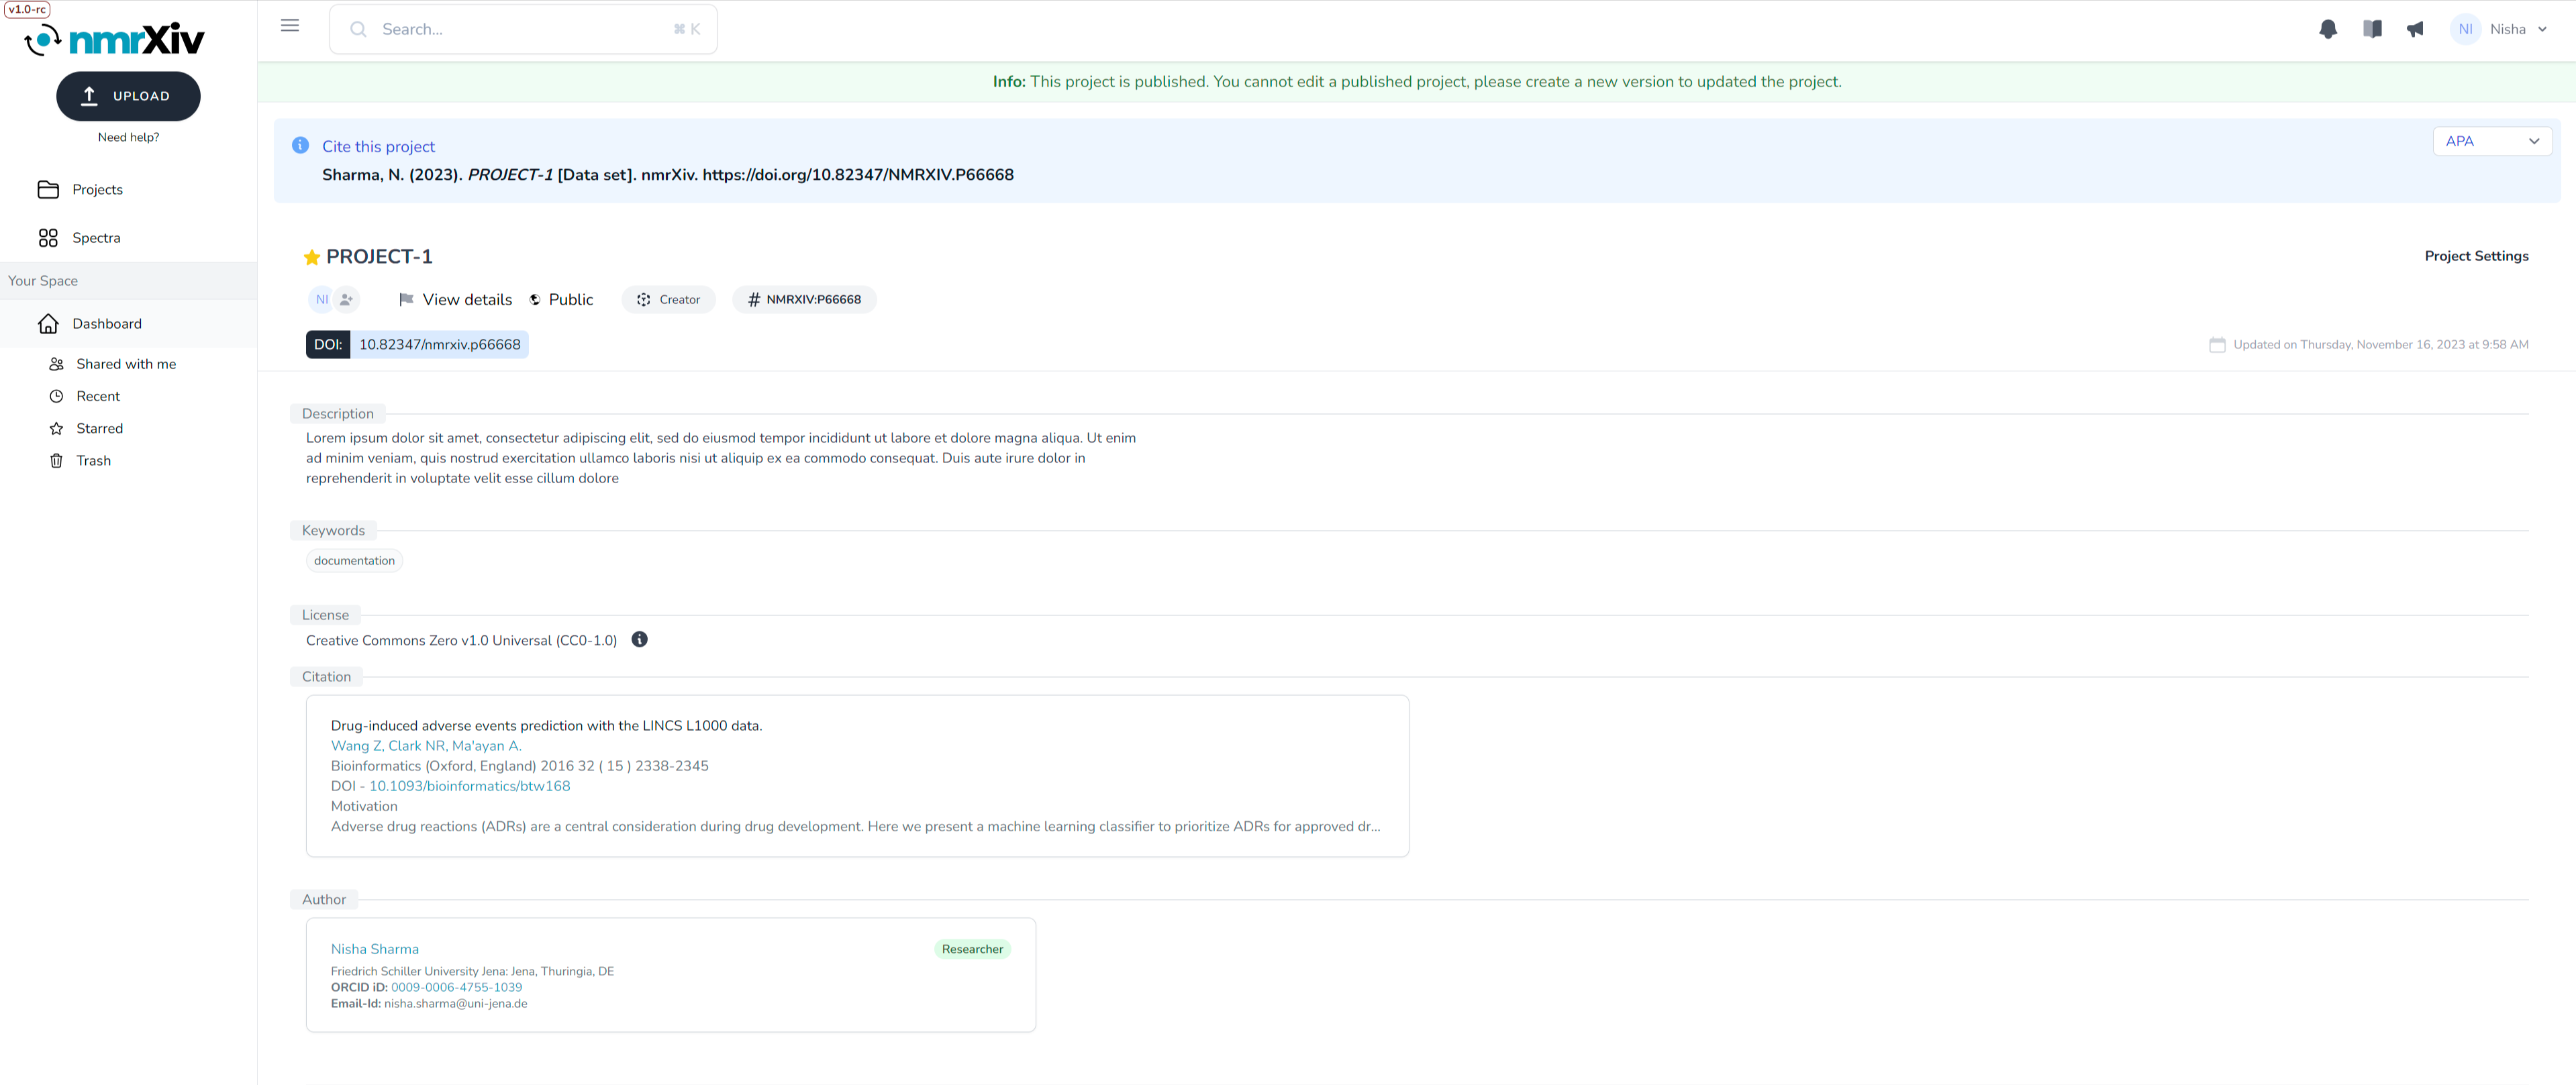
The public project view is similar to the private's, but still, there are some differences. Once a project is public, a green bar appears at the top informing the user that no more edits are possible, and any needed changes can be made as a new version. Moving down, a blue bar contains the citation details which can be adjusted according to the citation system (can be picked from the drop-down menu on the right). The citation includes a DOI to the project, which contains the project identifier (P7 in the image). This identifier always has the structure of "P", which stands for the project, and a number. Projects identifiers are Persistent Identifiers (PID) within the repository. Additionally, all the Edit buttons disappear in public projects as no more editing is allowed after publishing.
Create
The only way to create projects is through the Data Submission.
Access
You can find your created projects in the Dashboard (or in the team dashboard), while you can find the ones shared with you by others in the Shared with me folder. All the public projects on nmrXiv are in the Projects folder, and the projects you viewed recently are in the Recent folder. Projects that you have starred (along with starred samples) can be found in the Starred folder. In the Trash you can find the projects you have deleted within the last 30 days. Please note that t the end of the 30 days, the project and all its resources will be deleted and they cannot be recovered. You can restore a deleted project within the 30-day recovery period.
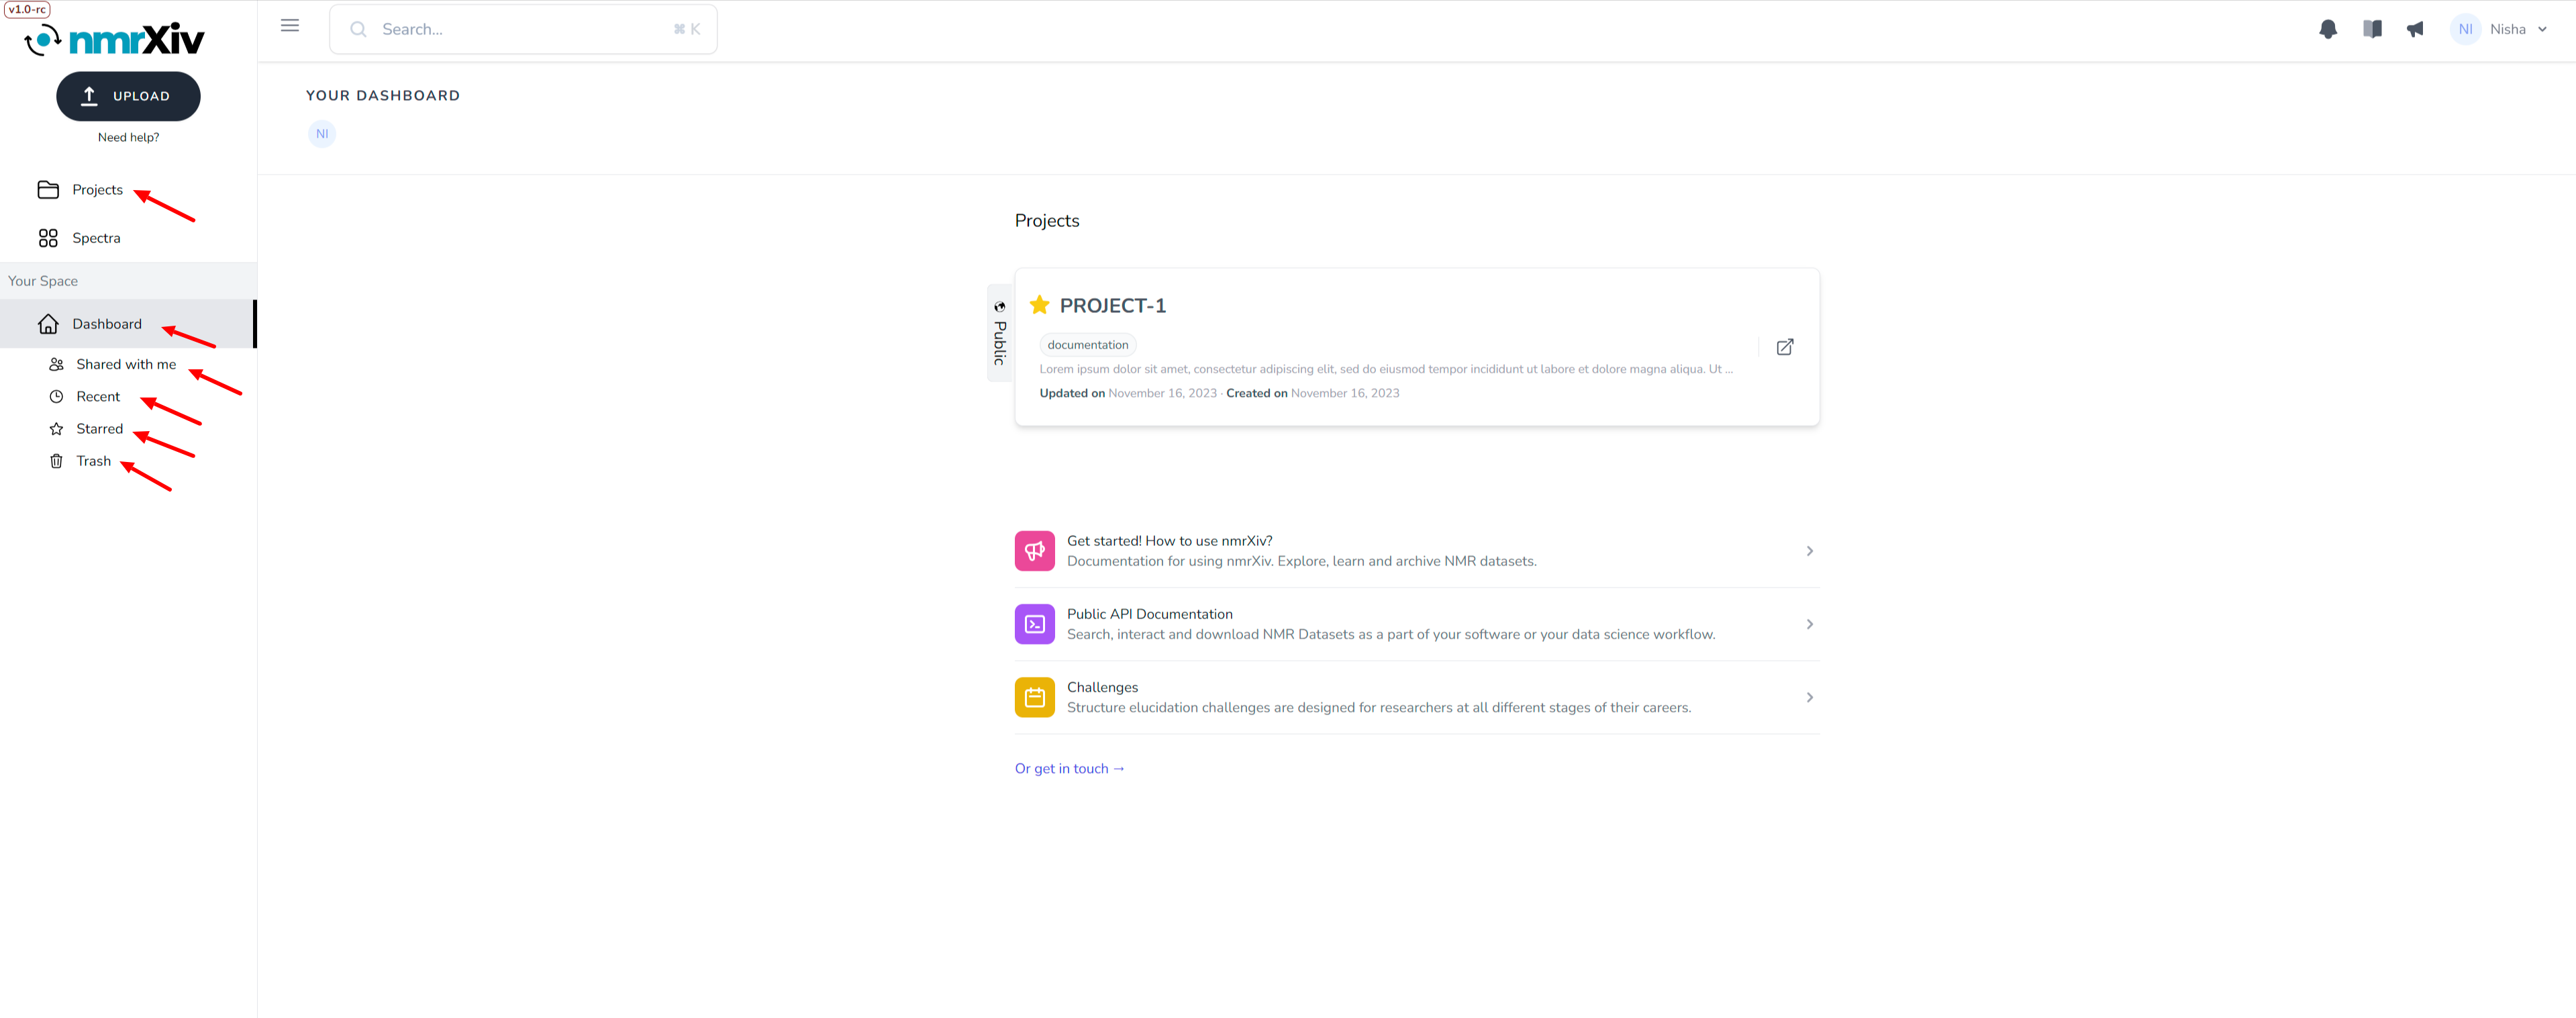
In the Dashboard, you can see a quick view of the project, including its name, privacy, and dates of creating and updating. You can also see if the project is starred.
Edit
To edit a project, you should have editing access to it, which is the case when you are its creator or when it is shared with you as an owner or a collaborator. The project should also still be private.
Enter the chosen project by clicking anywhere on its card from the Dashboard or the other folders, which leads to the project view. Within the project view, you can edit the project from View details at the top or from any Edit button found next to the fields. Additionally, you can edit the files in the project by adding or deleting them with the Manage samples button at the bottom.
View Details
Clicking on View details opens a side menu.

In the side menu, the user can edit the project's name, description, keywords, and license. If you are not sure which license to use, please check the link How to choose the right license? provided next to the License field. The user can also view the privacy, and add a photo to the project which can be seen in its public view or replace an existing one. At the bottom, there is a link to learn more about sharing, and an activity button, which opens a new side menu to show the updates history of the project.

Edit Button
For the Description, Keywords, and License fields, the Edit button will open the same side menu as with View details, while it has a different function for other fields.
Edit the Citation will pop up a new window Manage Citation.
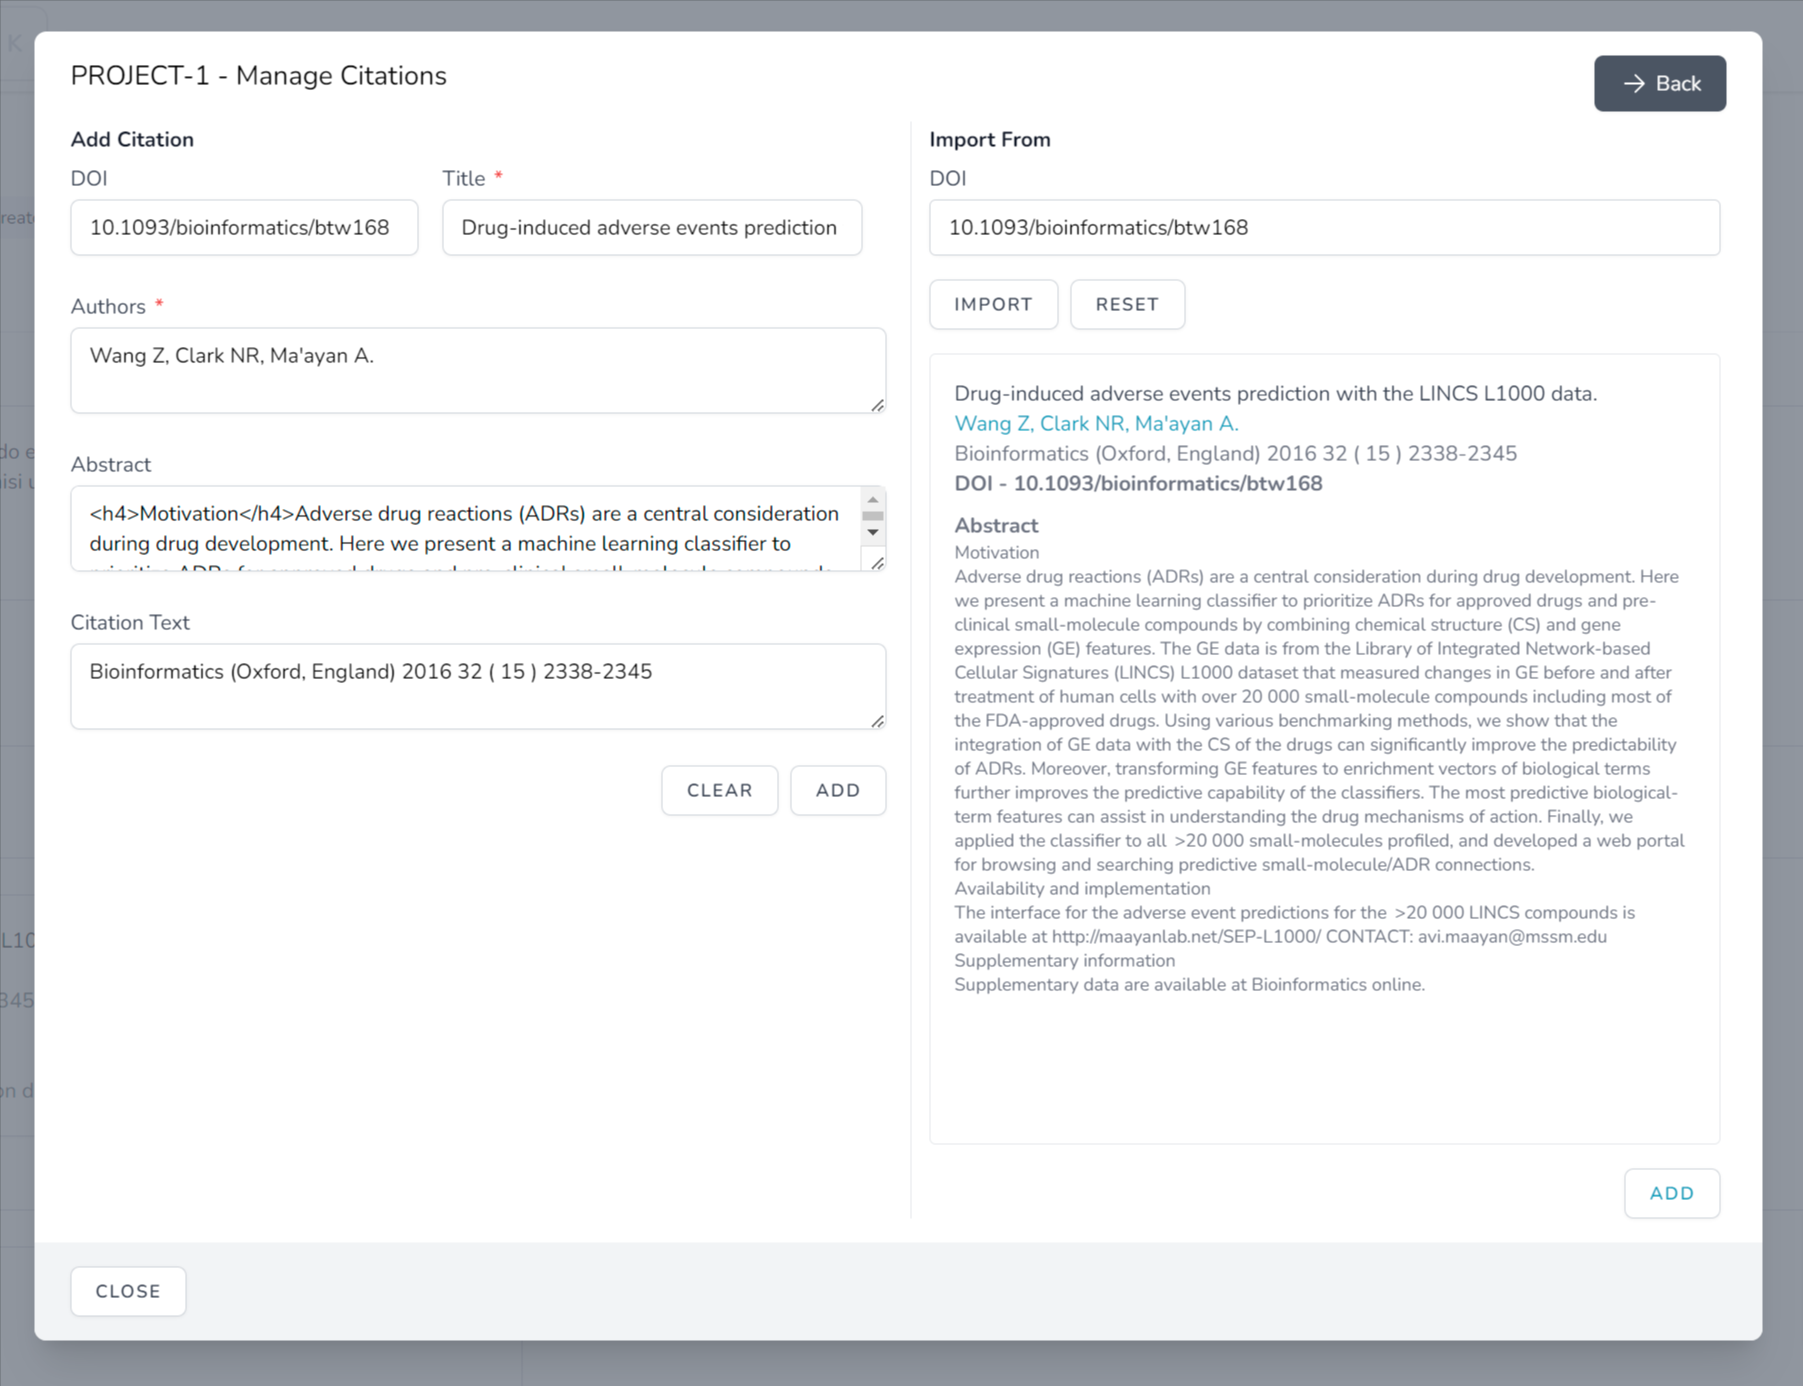
Manage Citation window enables adding/editing the citation by either importing from a DOI or manually filling the fields, where all the fields marked with a red asterisk are mandatory. If the user is satisfied with the article imported from the DOI, or when they finish filling in the fields, they need to press ADD, which then shows an overview of the entered information. If the user is satisfied with it, they press SAVE. Otherwise, they can delete the citation or CLOSE without saving. This window also enables deleting previously entered citations.
Edit the Author will also pop up a window Manage Author where the user can use an article DOI to import its authors or enter the ORCID to fetch the corresponding author. By clicking IMPORT, a list of authors appears so that the user can select out of it with checkboxes. An alternative would be to enter the authors manually, where all the fields marked with a red asterisk are mandatory. If the user is satisfied with the article imported from the DOI, or when they finish filling in the fields, they need to press ADD, which then shows an overview of the entered information. If the user is satisfied with it, they press SAVE. Otherwise, they can delete the author data or CLOSE without saving. This window also enables deleting previously entered authors' details.

Manage samples
Files and folders stored under the project can be managed (by adding more or deleting some out of them) with the button Manage samples, which leads you back to the first step of upload window, where you can add more files by dragging and dropping to the project folder, or delete existing ones by selecting them in the left panel and clicking Delete button. Once the editing is done, you can click Proceed to continue normally until the end of the submission pipeline.
Folder Structure
Please pay attention to preserving your project folder structure when adding more samples. This means that the new sample should be added to the same level as the rest of the existing ones. The recommended structuring is to group all the samples in one folder and then upload this folder. Thus, when adding a new study, it should be added to the same folder and not the root. In the following image, the study should be added to the data folder. Please find more in Folder Structure documentation

A small clip showcasing on how to manage samples.
Validation
To publish a project, i.e., to make it public, it must comply with community standards. At the moment we are checking for DataCite mandatory metadata needed to receive a DOI in addition to requesting an image for the project. If any piece of metadata is missing, you will see a Why can't I publish? link message at the top of the project view.
Clicking on Why can't I publish? leads to a new page similar to the step-3 of the submission pipeline. Here you can find either red x or green ✓ to indicate the existence or absence of the metadata respectively. Whenever the red x exists, it is accompanied by an Edit button to facilitate providing the missing data. Missing metadata at the level of the study can be inferred from the red highlighting of its name. More on validating samples in the study page

Share
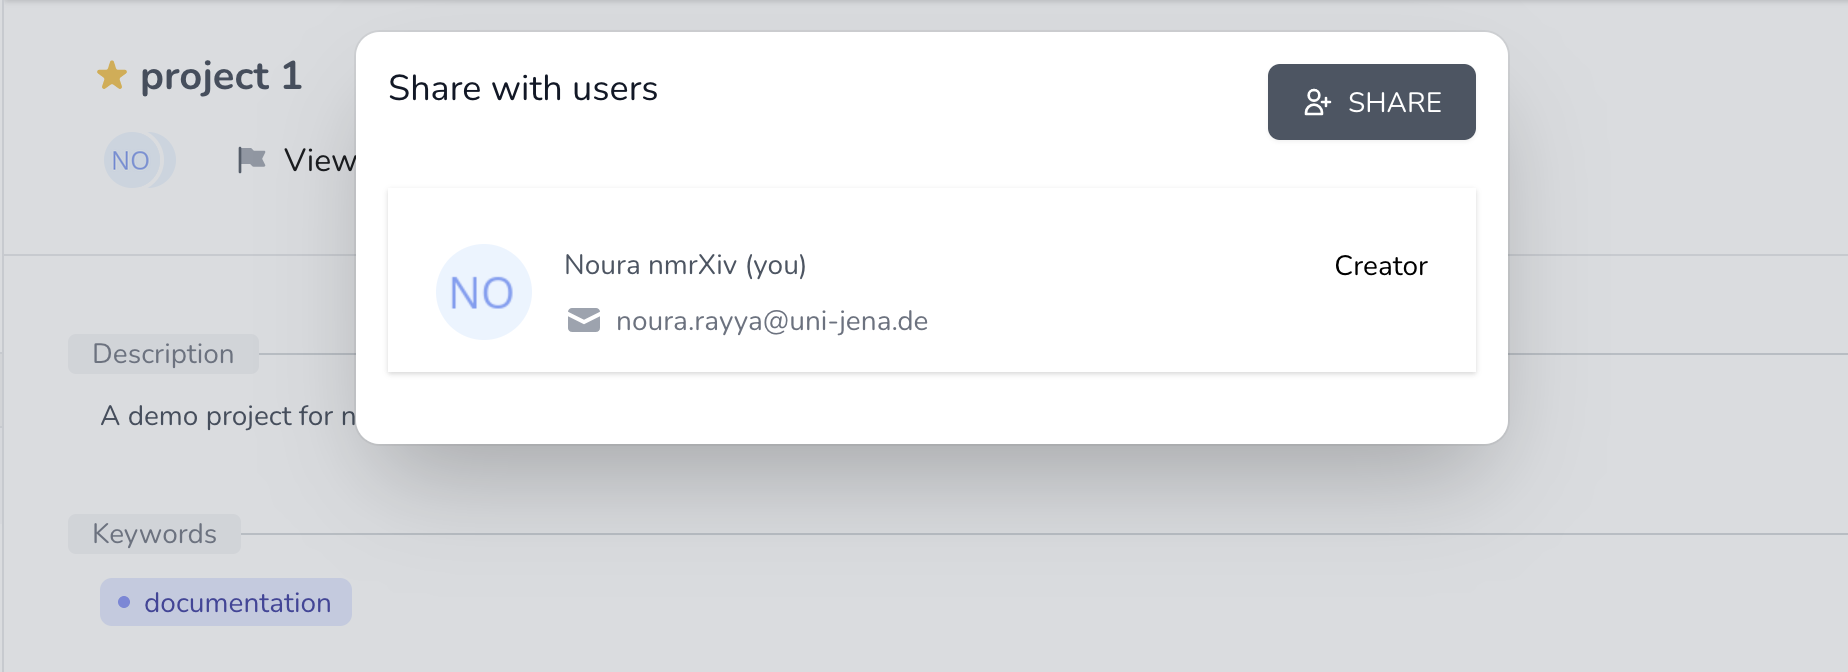
When generating a project, it is shared by default with its creator. When it is generated in a team, then it is shared with the team members. At the top of the project view, there are avatars of the users with whom the project is shared as circles with either their images or names' first letters. Clicking on those avatars enables modifying the sharing settings by first opening a window that shows with whom the project is already shared along with the roles.
Then the user can click on the button Share, which will open another window to share the project with other users.
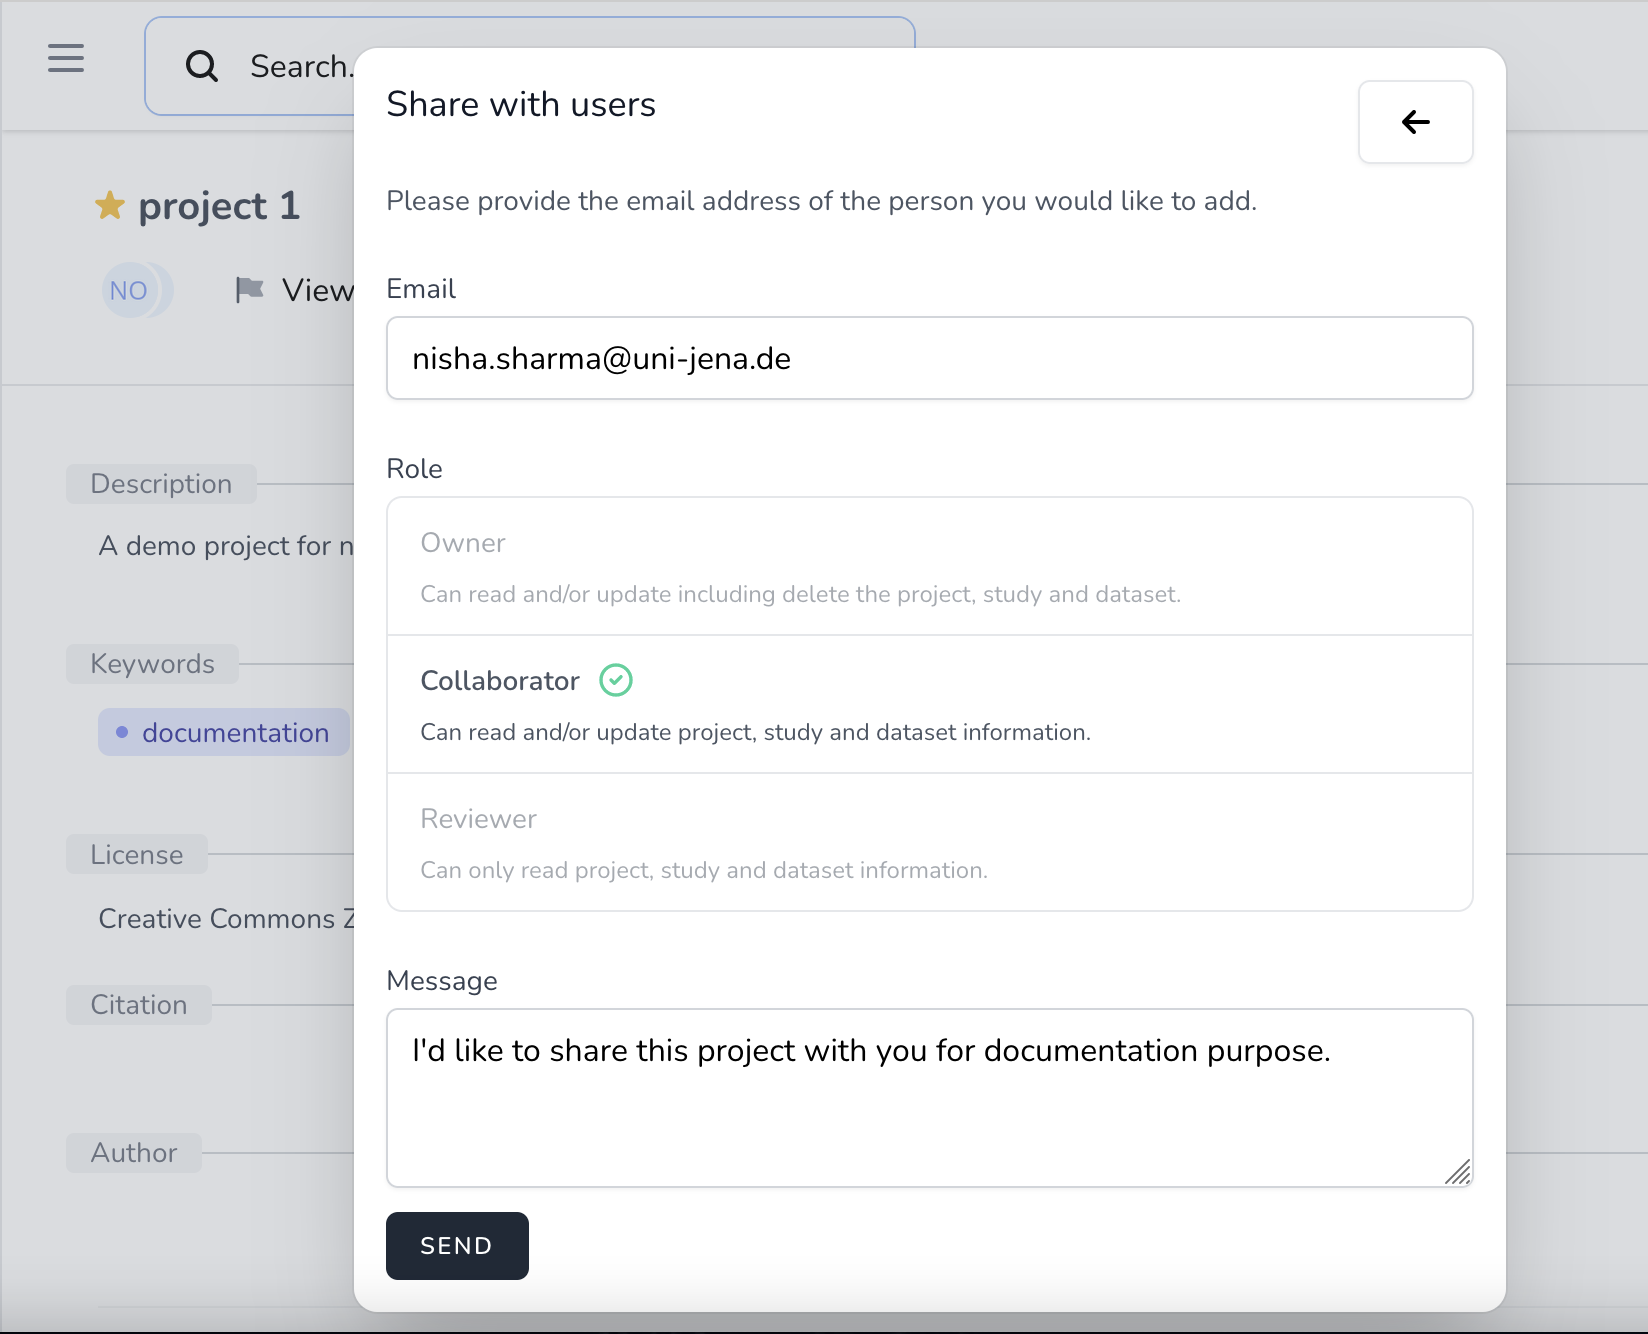
In the opened window, the user needs to fill in the email and select the role of the user to share with, and they can optionally add a message. There are three roles for sharing:
- Owner: read/update/delete the project/samples/datasets.
- Collaborator: read/update the project/samples/datasets. A collaborator cannot delete any of the project content.
- Viewer: read the project/samples/datasets. A viewer cannot update or delete any of the project content.
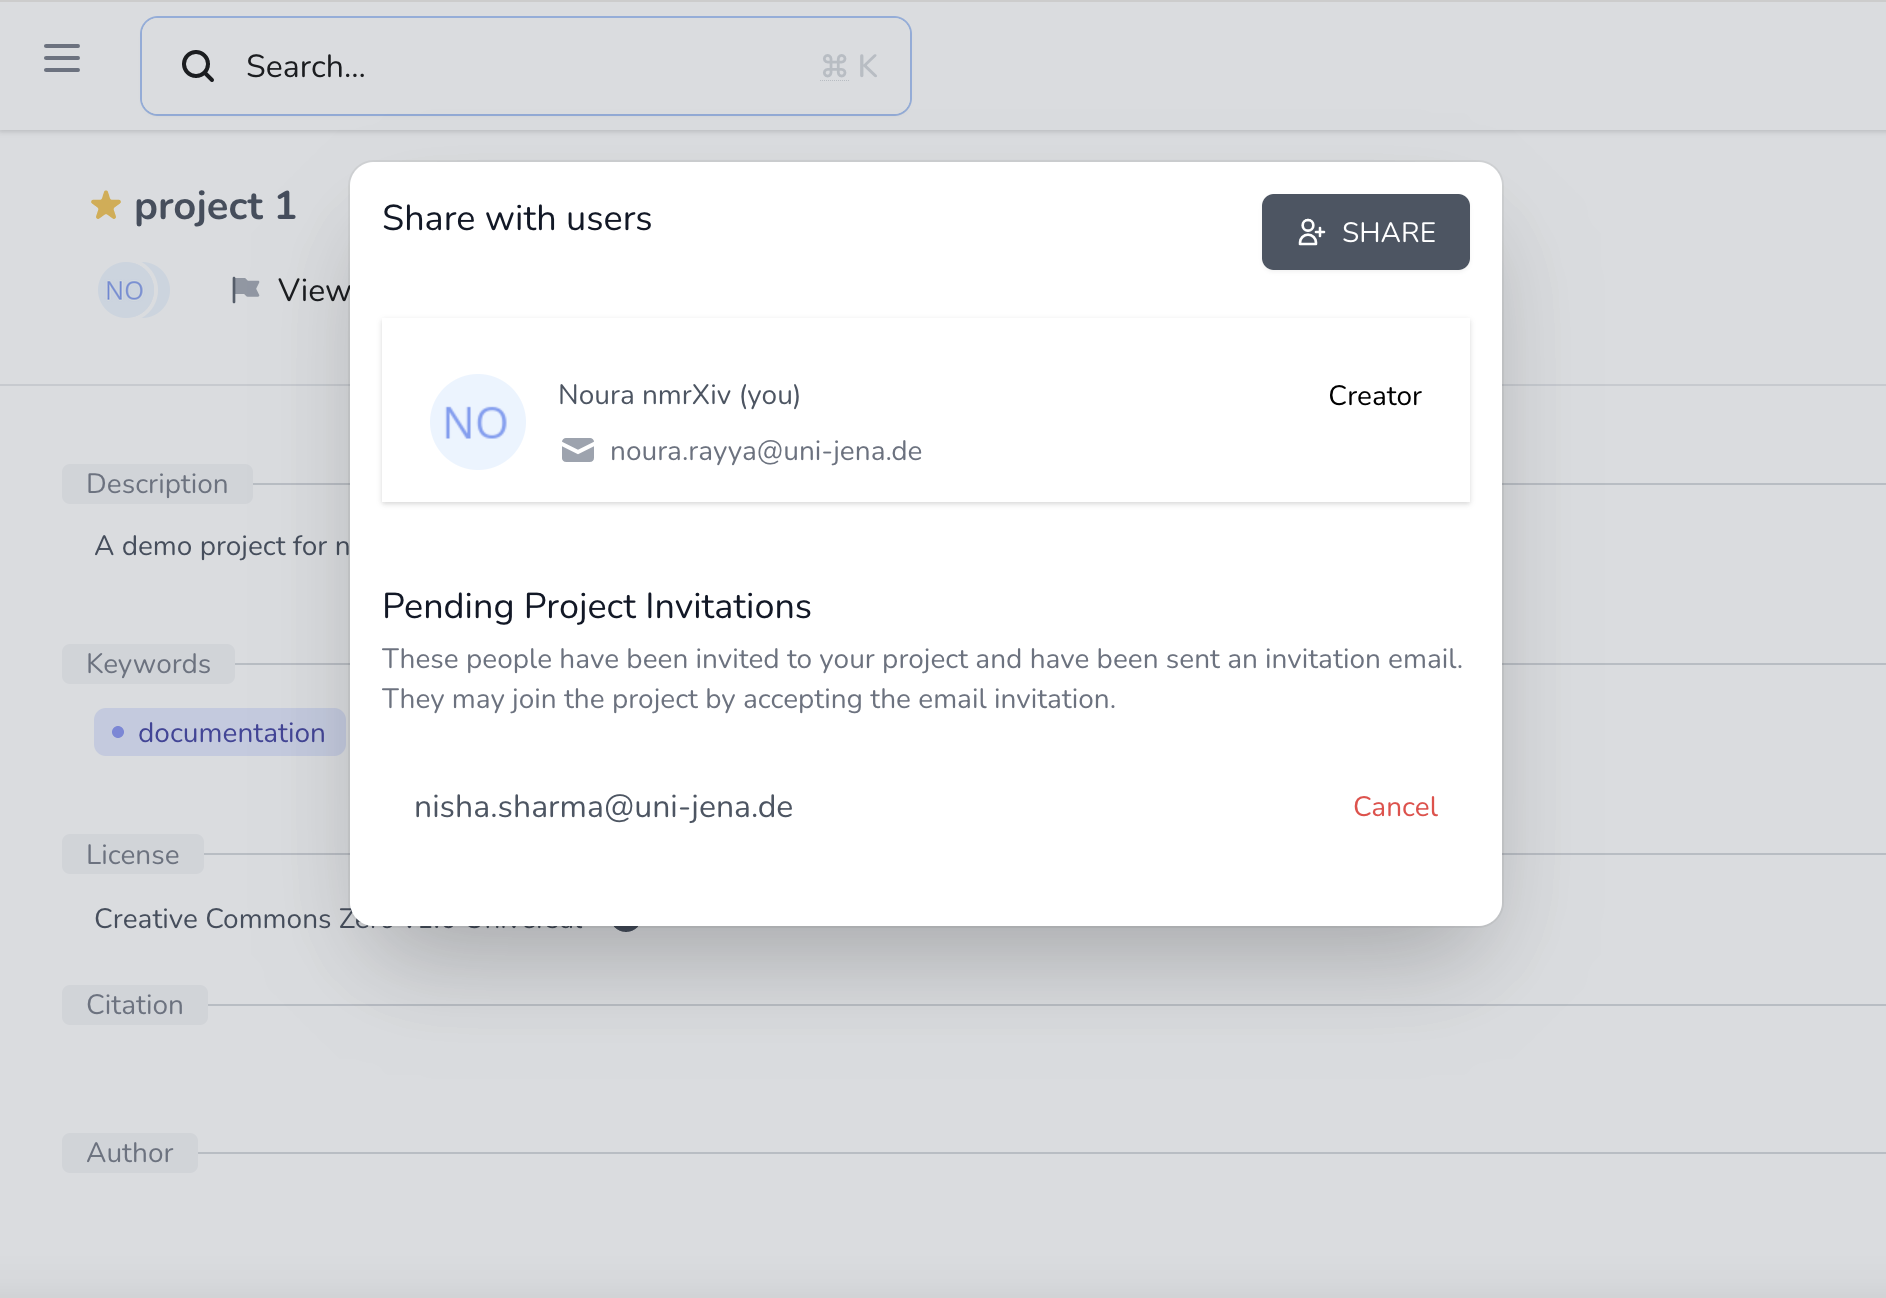
When the user is satisfied with their entries, they can click SEND to send an email to the other user. Then the window gets refreshed to enable entering details of other users to share with them. When all the invitations are sent, the user can click the back arrow to go back to the project sharing-status window, which will be updated to show the status of the new invitations. Sharing can be canceled as long the invitation is still pending (not accepted or rejected by the receivers).
After an invitation is accepted, the creator can still remove any of the members, while the owners can remove any of them but the creator.

Project Up
After projects are published, they can be found in the Projects folder in the left panel.

nmrXiv users can use the up arrow, which can be found at the top right corner of each project, to give it an "up", increasing the number next to the arrow by one. If the user finds a project interesting, if they have used the provided data there, or if they are aware of similar confirming work, they can press the "up" arrow, and based on the number of users who decided to move a project upward, the project will move up in the view of public projects.
Sorting projects by the number of ups is not provided yet, but it is coming soon.
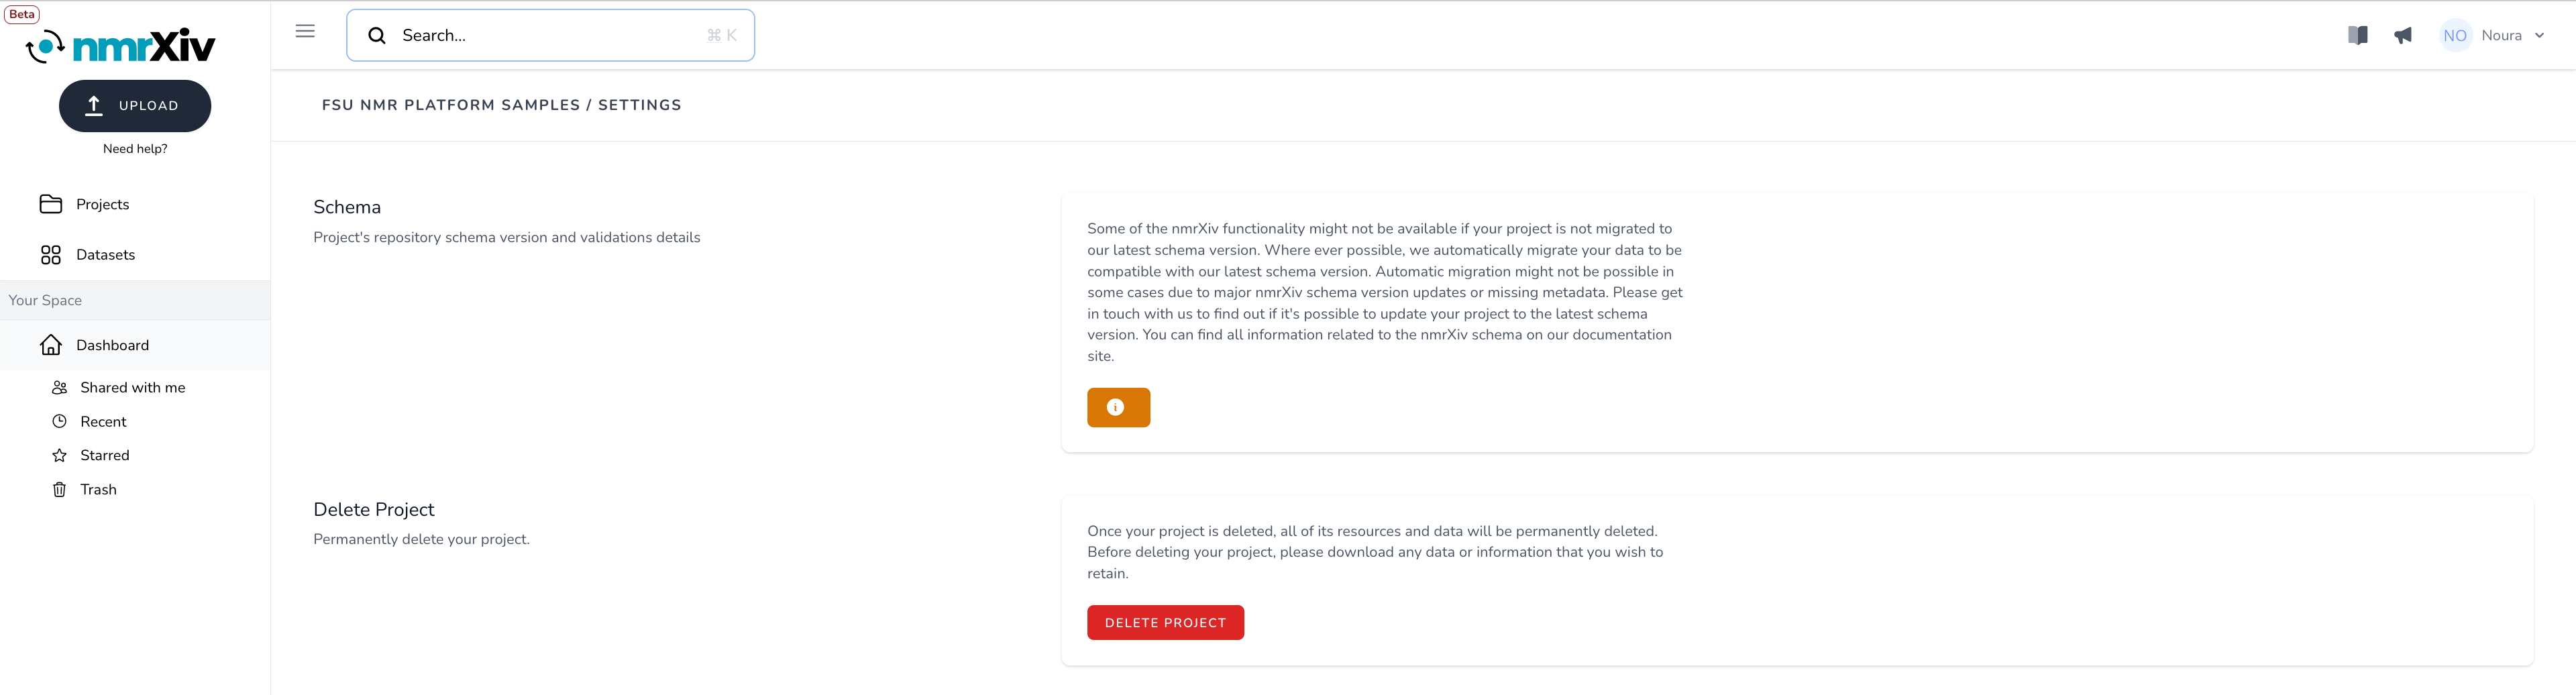
Delete and Archive
Only private projects can be deleted, while public ones can be archived. The reason is that once a project is public, it can be referenced somewhere else, which requires the repository to keep an active link to this project. Therefore, when the creators of a public project decide that it is no longer maintained, or that the data provided is not accurate, they can only archive it instead of deleting it, while deletion is always an option for private projects.
To delete/archive a project, click on Project Settings at the top right of the project view. It will lead to a new window where you can click on DELETE PROJECT/ ARCHIVE PROJECT.
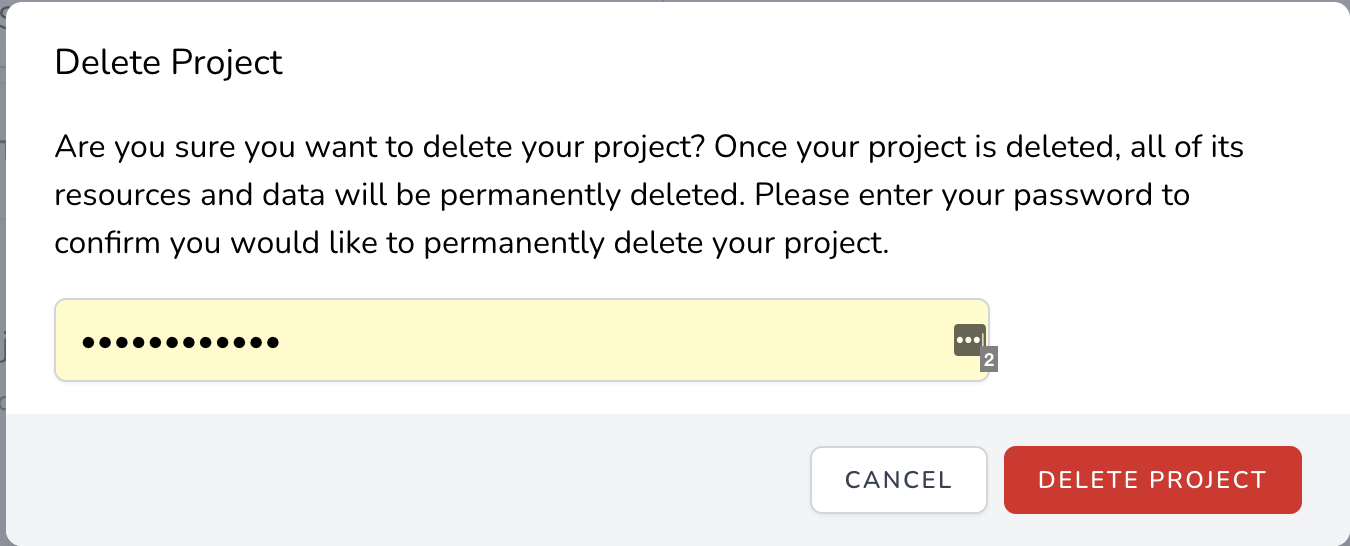
To avoid accidental deleting/ archiving, the user has to confirm their choice again and enter their password.
WARNING
In the case of deletion, this action is reversible for 30 days as the deleted project will be stored in the Trash folder, where the user can find the project and restore it from the Project Settings. After 30 days, deletion leads to permanently deleting the project and all of its content data. In the case of archiving, the user can unarchive the project anytime from the Project Settings. Archived projects are not moved to the trash.